Hi everyone!
I finally found the time to translate into English the journal I wrote years ago during the construction of my arcade cabinet.
The original Italian version is available here.
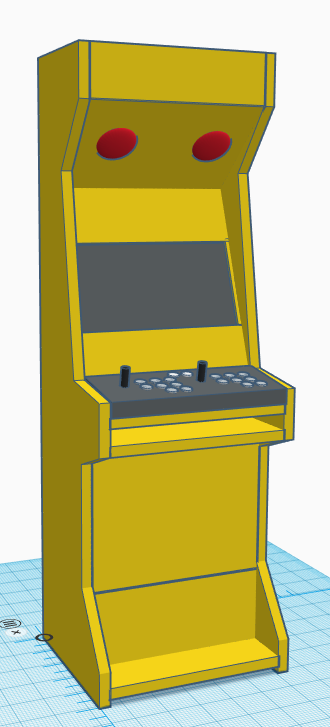
I’m here to tell you about my adventure in building a completely homemade arcade cabinet that I named the Bekabinato.
Small premise
I was born in 1981 so I was able to experience the 1990s in my early teens, one of the typical hangouts and entertainment places of those times were undoubtedly the “amusement arcades” filled to the brim with arcade cabinets, pimples, 200 Lire (old Italian currency) coins, and in rare cases 500 Lire coins.
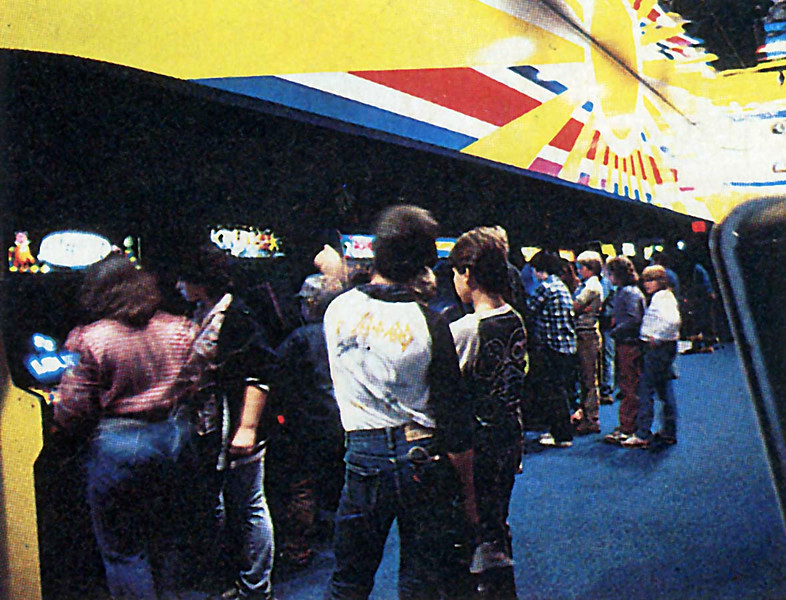

Home consoles were not yet able to compete with the hardware performance and especially the social impact that arcade cabinets had.
Becoming particularly good at a video game, especially a fighting game, meant respect from the micro pack in the arcade! It meant that regardless of your stature, age or musculature, if you decided to put a token down to challenge a guy to Street Fighter 2 in that same instant you became equal! Anyone could be fearsome, and there were no discounts for anyone. Once inside, the reality for a few minutes stood aside, no one even spoke, even the boys observing the confrontation from outside remained silent, as if in respect of the importance of what was taking place.
Although I fully realize that much of my memories are exalted by the mind of a young boy, who by the way dreamed even then of making video games, I am certain that the arcade cabinet represents something magical for many of you as well, and what follows is the chrono-history of the days leading up to the creation of my arcade cabinet!
I decided to write this sort of diary by conjugating it largely in the remote past on purpose, in the hope that these words will stand the test of time and that one day, many years from now, my son Enea, who is now only 4 months old, will be able to find them again.
Day 1 (15/04/2018) – The decision
The day I made the decision to build an arcade cabinet came with a disconcerting naturalness: we all have dreams or desires in our thoughts, and every once in a while some of these resurface spontaneously without any warning. In my case I was on the phone with my old friend Met talking about my recent Mini-C64 purchase and how it was a blatant amarcord operation for incurable nostalgics.
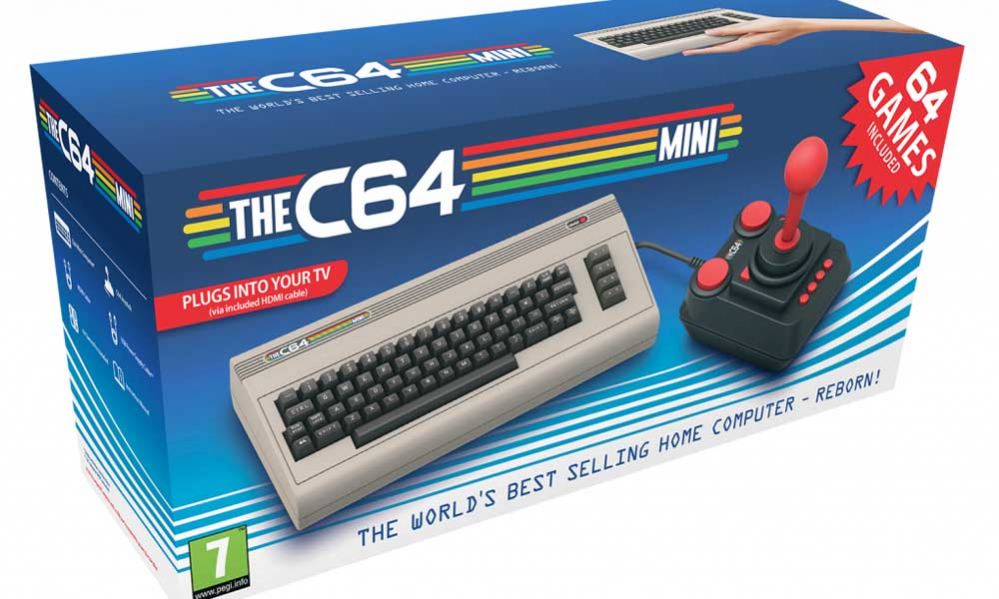
He retorted that it was just a matter of form since nowadays it is possible to play any retro title on an emulator from the comfort of a PC, and at that moment I found myself saying, “That may be true, but you want to put the physicality of an arcade cabinet!” and shortly afterwards I added, “actually I’ve been wanting to build my own arcade cabinet for a while” and at that point a simple thought went from being a teenager’s dream to an “adult’s” project.
Day 2 (21/04/2018) – The project
A wise person once told me that planning a project is a bit like planning a journey: to get from point A to point B you first need to know the distance between these 2 points, accurately choose the means and the route to be taken so that you can meticulously estimate time and cost, and above all you do not need to plan what each step will be but rather key appointments of where you will be at a certain point in the journey.
To get a good understanding of what I was dealing with, I began to read up on the Internet in search of those fools who had attempted the feat before me. I came across the Arcade Italia forum almost immediately, a reference site for arcade cabinet enthusiasts. Looking in the section dedicated to user projects I didn’t find anything convincing enough to follow step by step and after all the idea of being a mere executor of pre-packaged instructions didn’t appeal to me one bit, so I decided to design my own arcade cabinet from scratch.
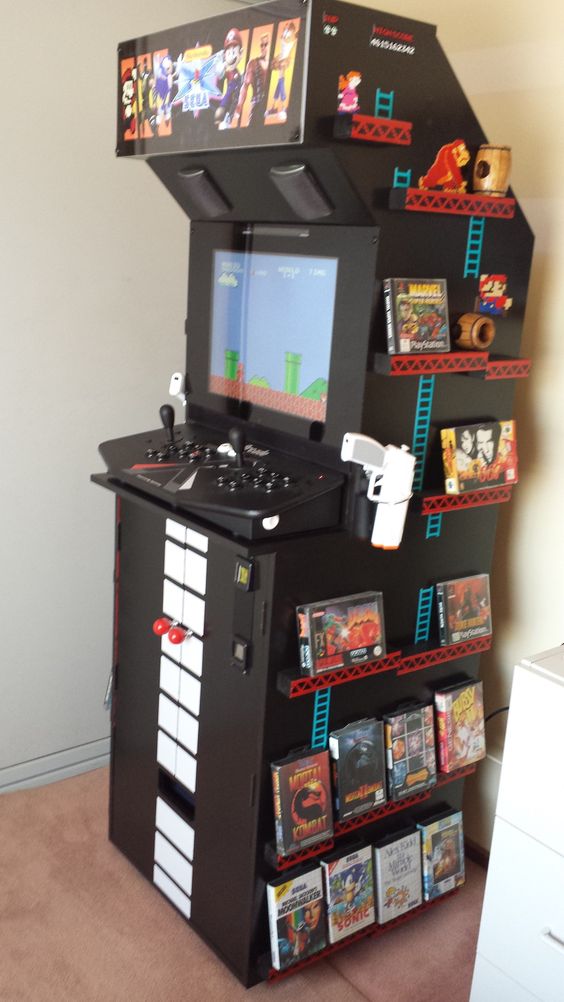
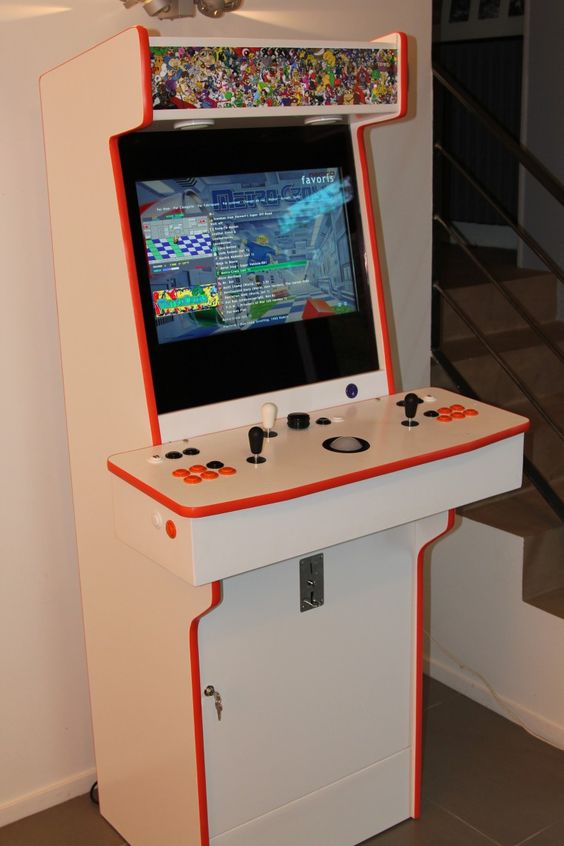
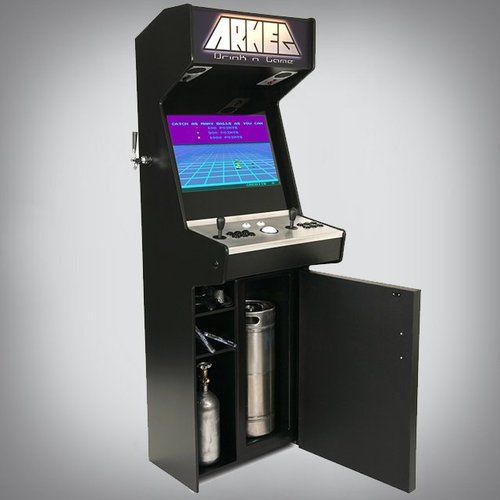
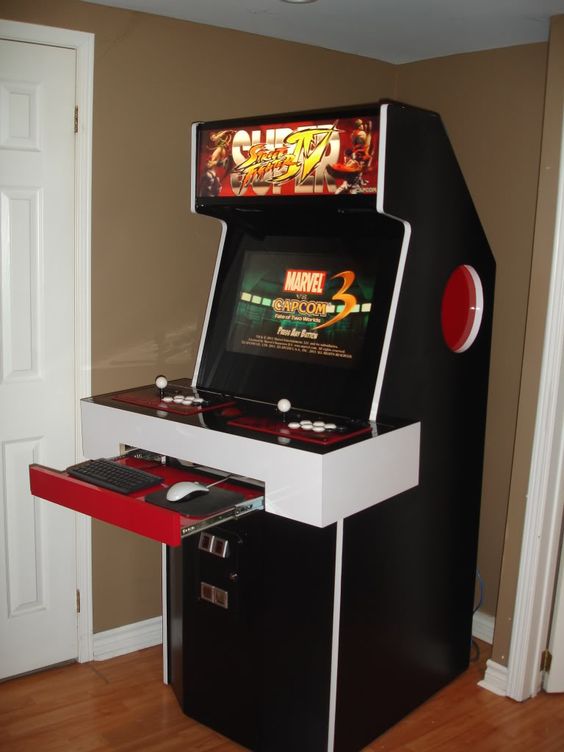
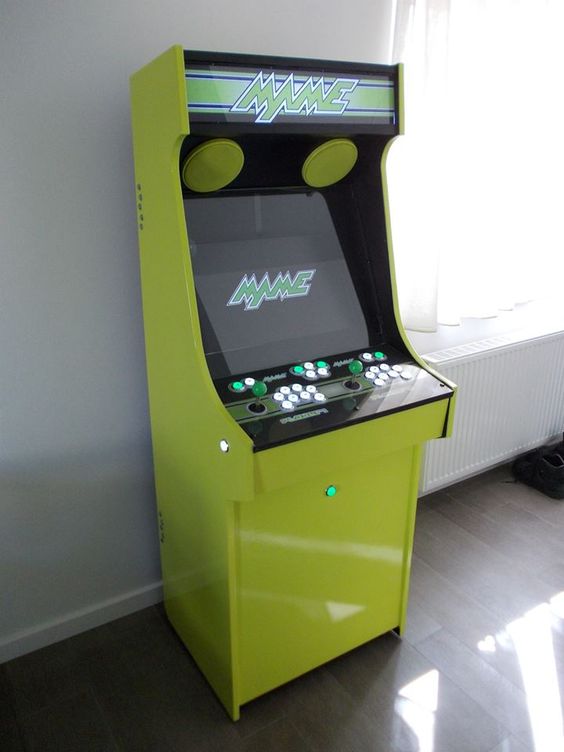
The very first step was to collect photographic material of amateur arcade cabinets:

I then began to outline a set of characteristics in order to define an operational perimeter:
- Use X-Arcade tankstick to be integrated into the booth
- LCD monitor (no CRT)
- Hidden but accessible keyboard
- Use an old PC (no Raspberry)
- Deep max 50 cm
- Max height 190 cm
- No batteries (no devices with batteries)
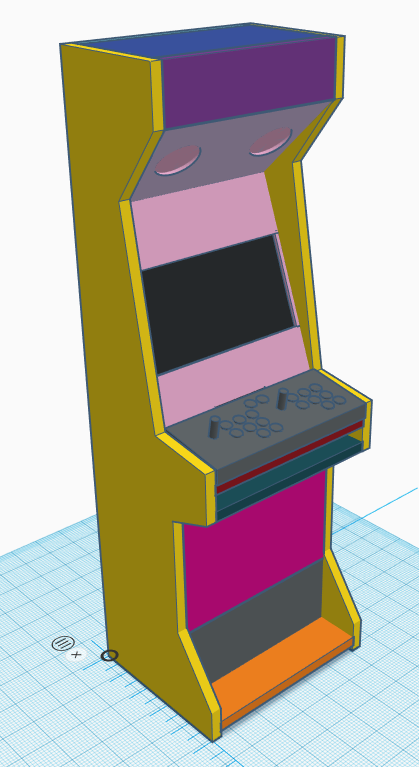
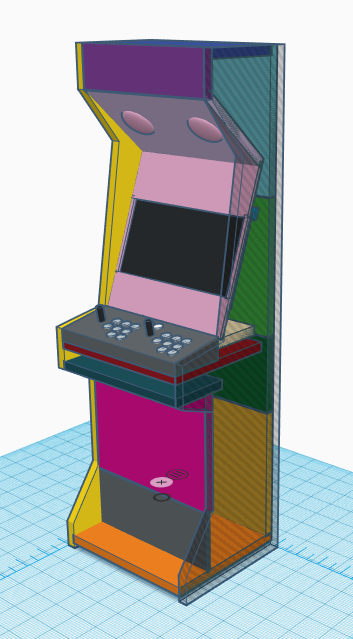
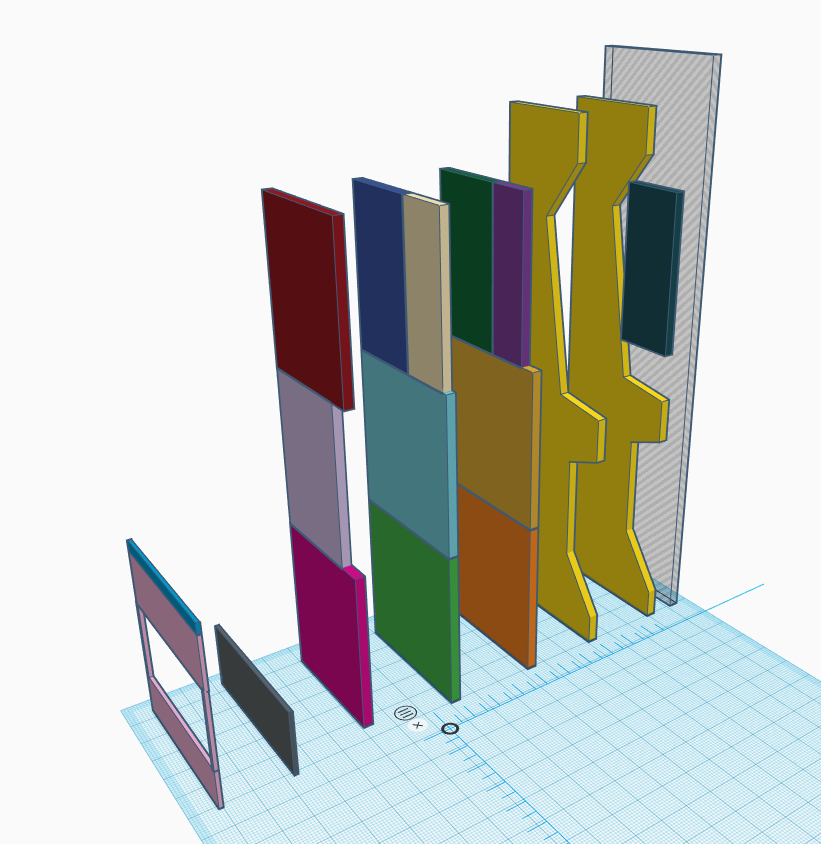
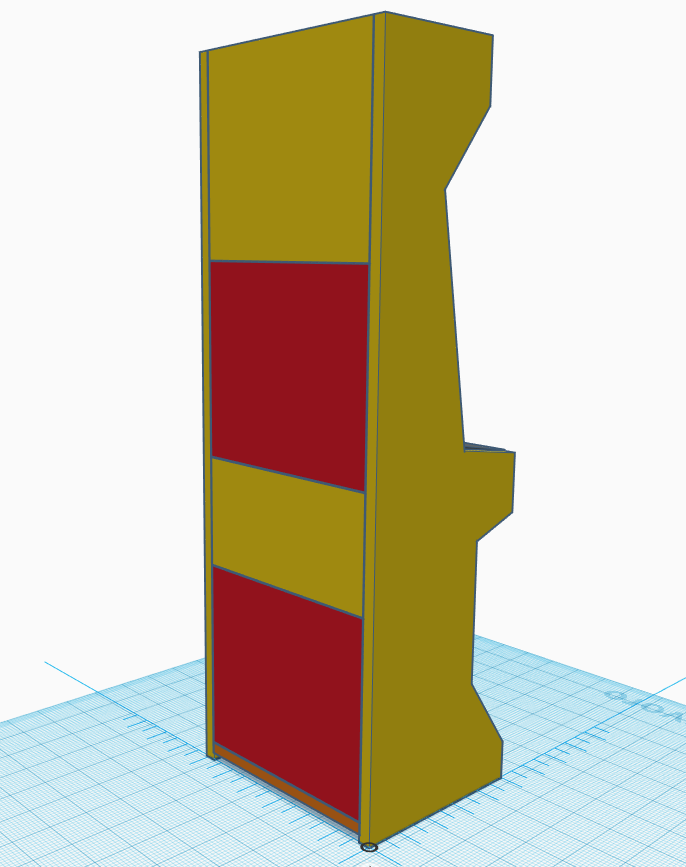
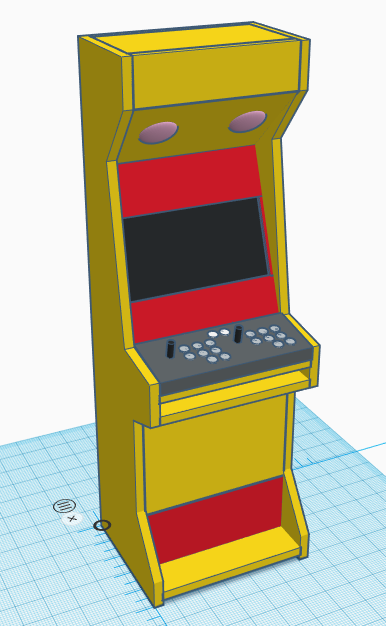
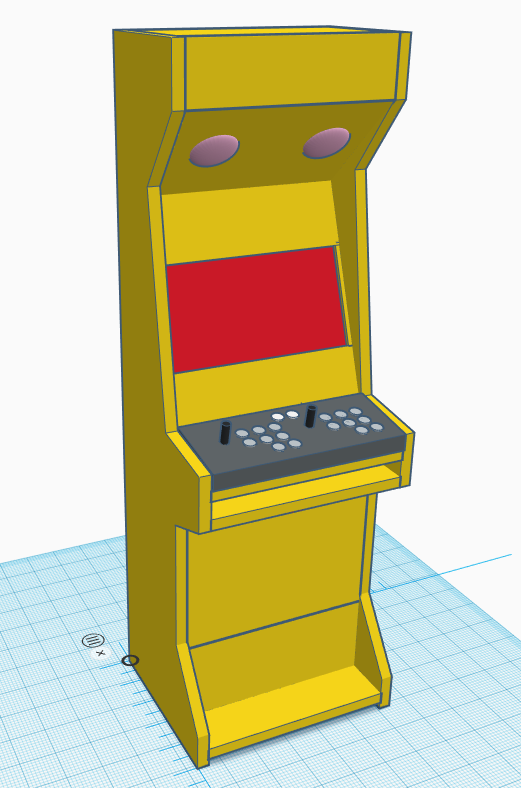
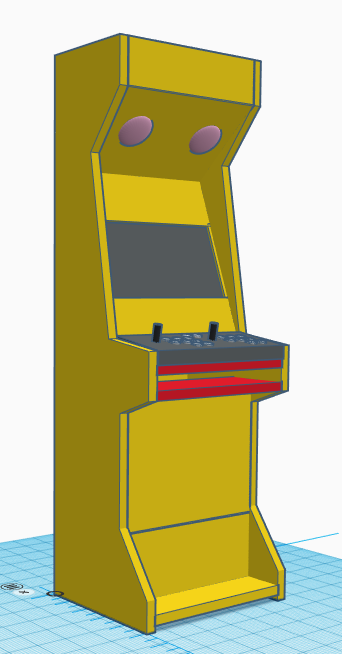
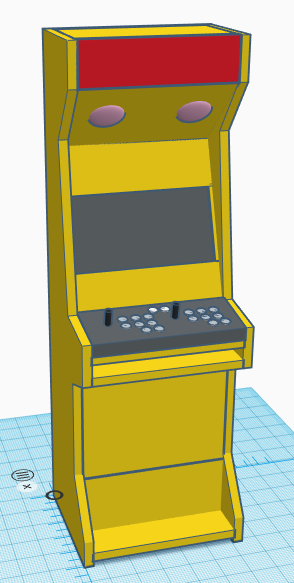
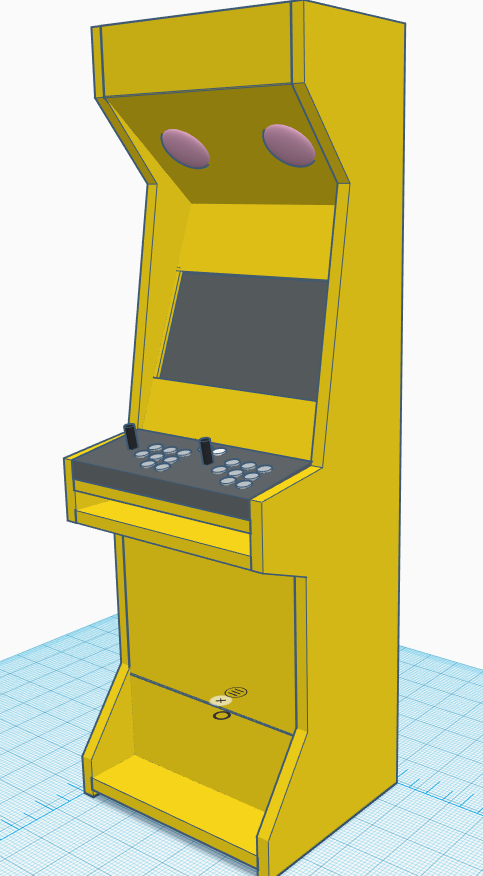
Once the main features were defined I began to draw the shape of the arcade cabinet, to do this best I decided to use an online software that would allow me to extract measurements and cuts accurately, after a short research I began to create my design on Autodesk Tinkercad, an online service intended for creating models for 3D printers.
After an intense day spent on Tinkercad I got this result:
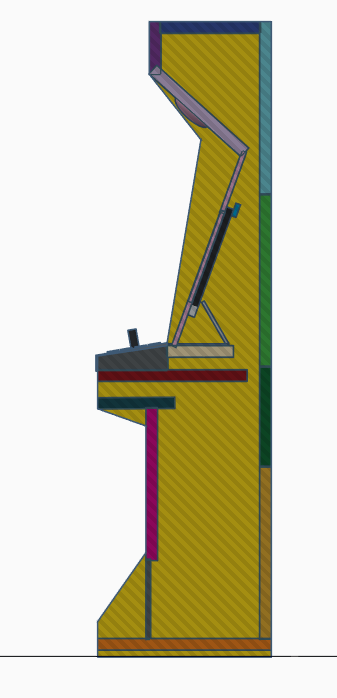
Having found a shape that respected all the characteristics I had set for myself I moved on to breaking down the pieces on boards of size 50×200 cm.
Now that the project was even digitally living its life outside my head, everything was beginning to take an increasingly concrete turn, and I could already smell the acrid sawdust smell of the wood that would shape my arcade cabinet!
For the benefit of posterity, THIS is the link to the project on Tinkercad.
Day 3 (28/04/2018) – The Pareto principle
Pareto’s principle states that about 20 percent of the causes cause 80 percent of the effects, a statement that finds concrete evidence in a surprising multitude of fields and disciplines.
Simply put in my case, the third day, that is, the first day of manual work, gave such a strong boost to the project that by the evening of the same day it seemed very close to finishing the arcade cabinet.
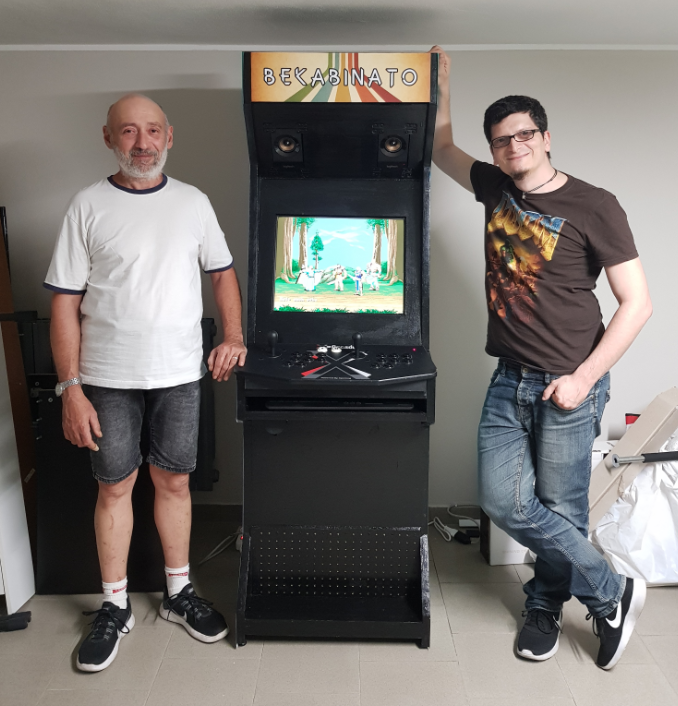
At this point in the story a key character was added: Alberto (Enea’s grandfather) the classic “handyman”, naturalized Bergamasque to boot! In short, the classic guy who with a screwdriver and some wood pulls up a brick wall. The guy who may not have studied much in life, but knows a multitude of manual trades such as to make MacGyver envious! I realize that this last quote will be completely obscure to many, especially you Enea. So just to give you a super summary of who MacGyver is:

This sober, 80s-heavy figure with a self-made missile (by him) on his shoulder is the legendary MacGyver! The protagonist of the successful 1980s series of the same name, a sort of fair-minded, good-natured, teetotal and environmentally friendly agent/superhero, but above all capable of getting himself out of any situation with the help of a Swiss Army knife, salvaged items and a lot of ingenuity.
But getting back to our story, that day after showing Alberto the whole project down to the last detail I explained to him that it would have to stand the test of time and therefore the choice of materials had to look above all at durability, Alberto for his part, as a good Bergamasque, suggested that I use reinforcing panels to create the base structure, basically massive 3 plywood fir panels almost 3 cm thick (2.7 cm to be exact).

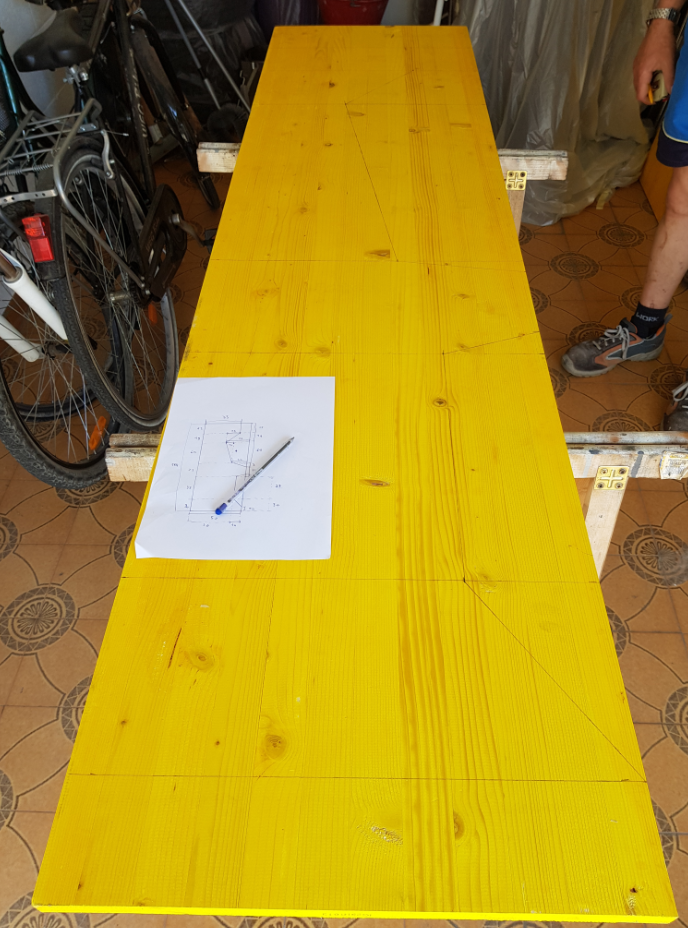
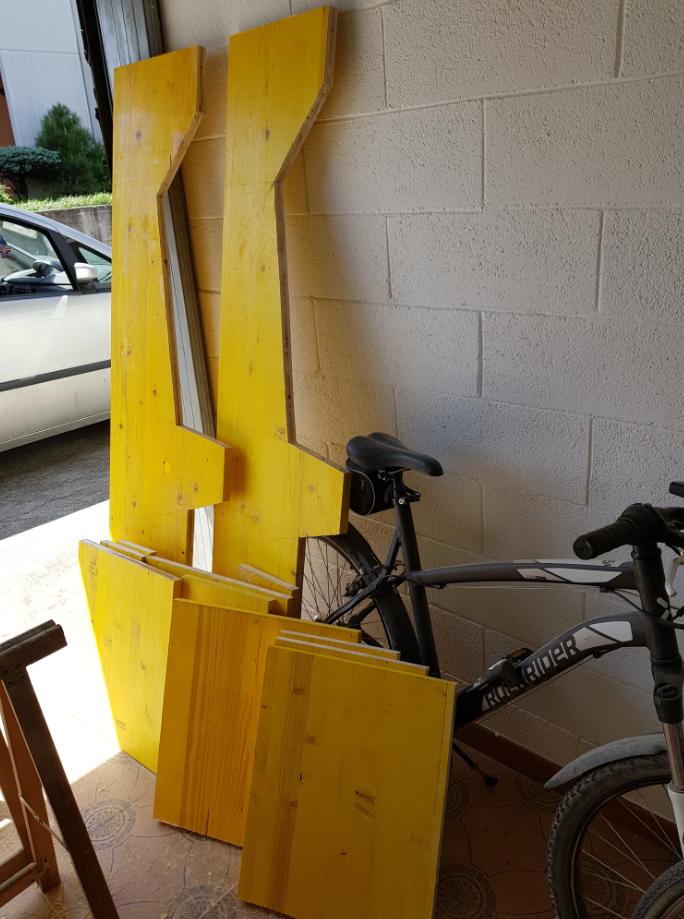
And so it was that in the morning of that day 5 beautiful 50cm x 200cm panels appeared in my garage.
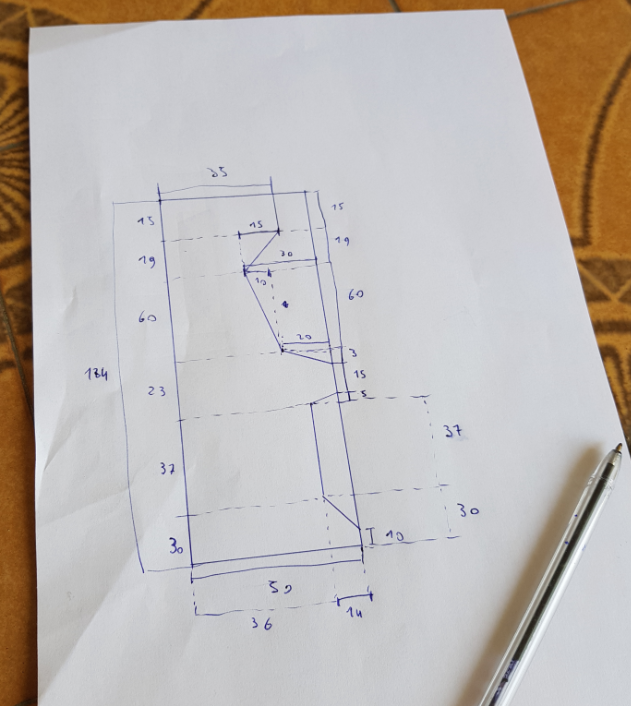
To best make the cuts, I transcribed the measurements of the Tinkercad project onto paper.
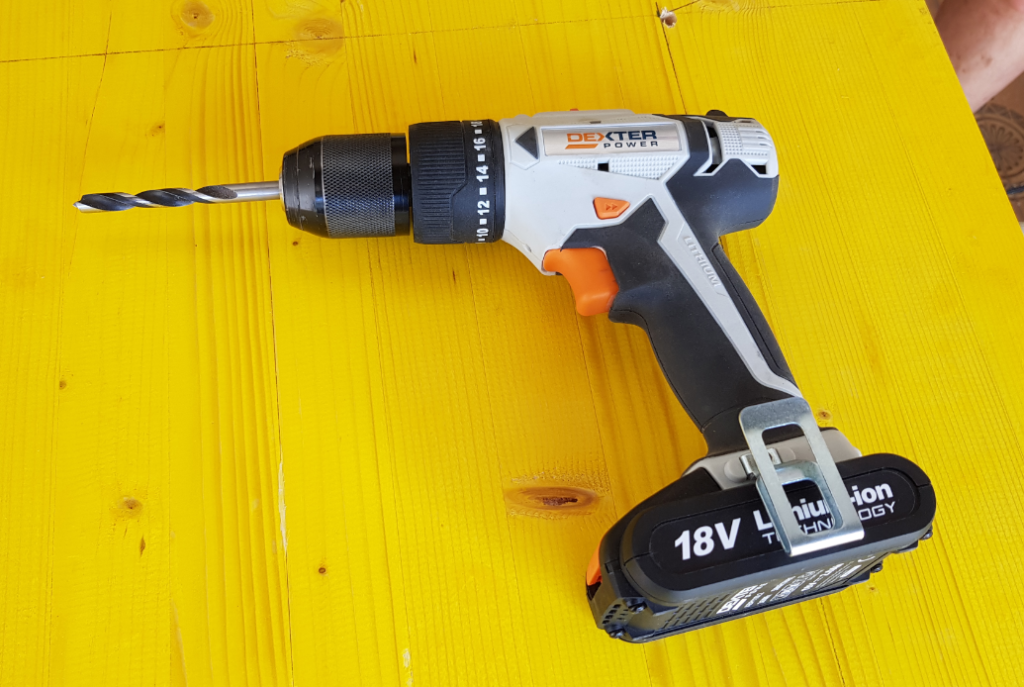
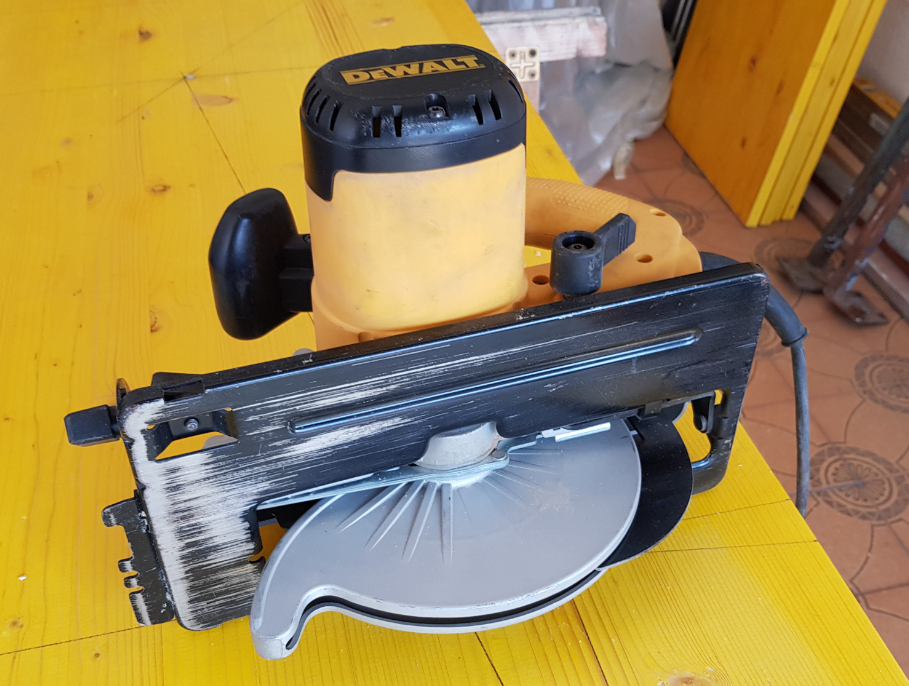
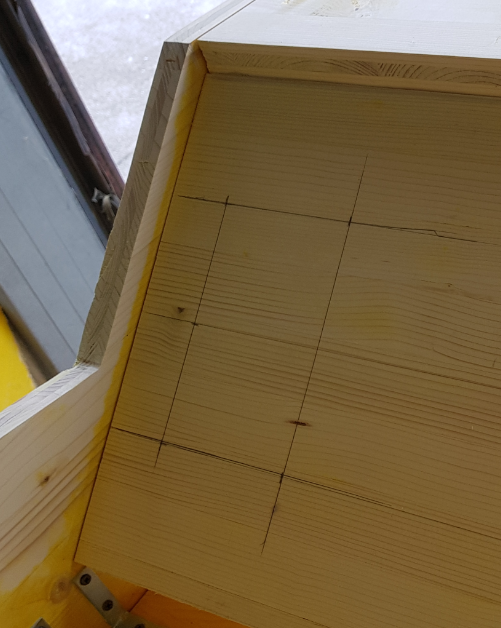
Everything was incredibly fast and natural, we spread the boards out on top of trestles and armed with a circular saw, jigsaw, flex, and drill we began to work on the virgin boards.
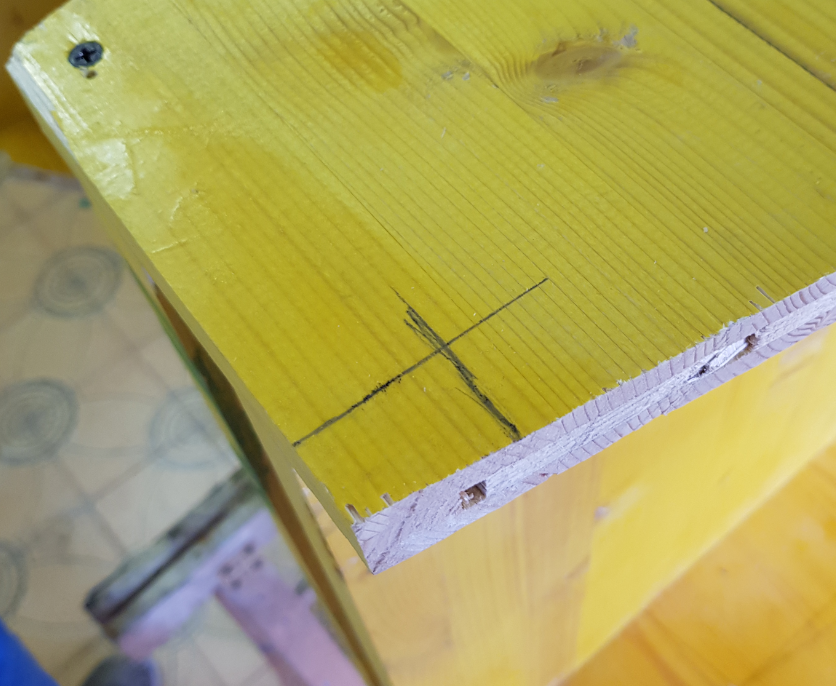
In a first step we marked the trace of the cuts on one of the panels with a pencil, preparing it for the first rough cut.
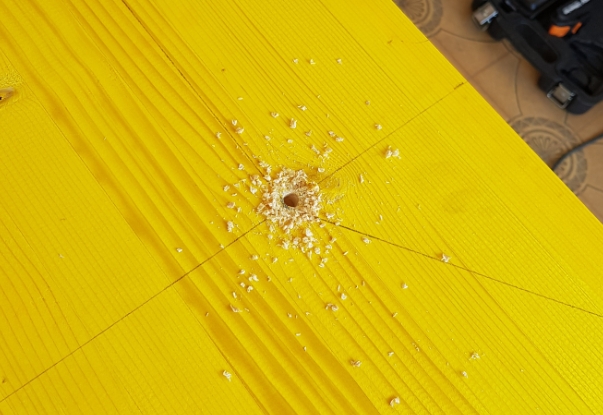
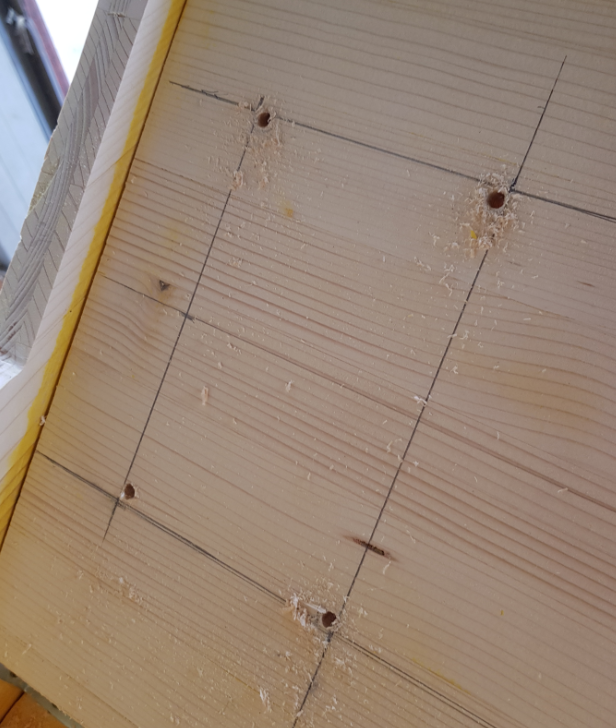
At this point we used the drill to mark the corners and to facilitate the work of the circular saw.
When it was time to use the circular saw I felt the real difference of having Alberto there with me, because probably if I had tried my hand at using this contraption from scratch …
… the end result would not have been as accurate and perhaps the sum of my limbs would not have made 4 anymore.
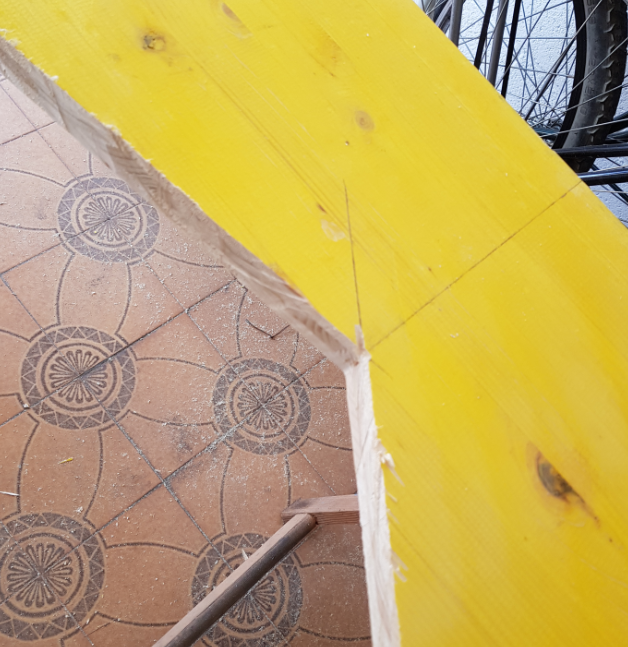
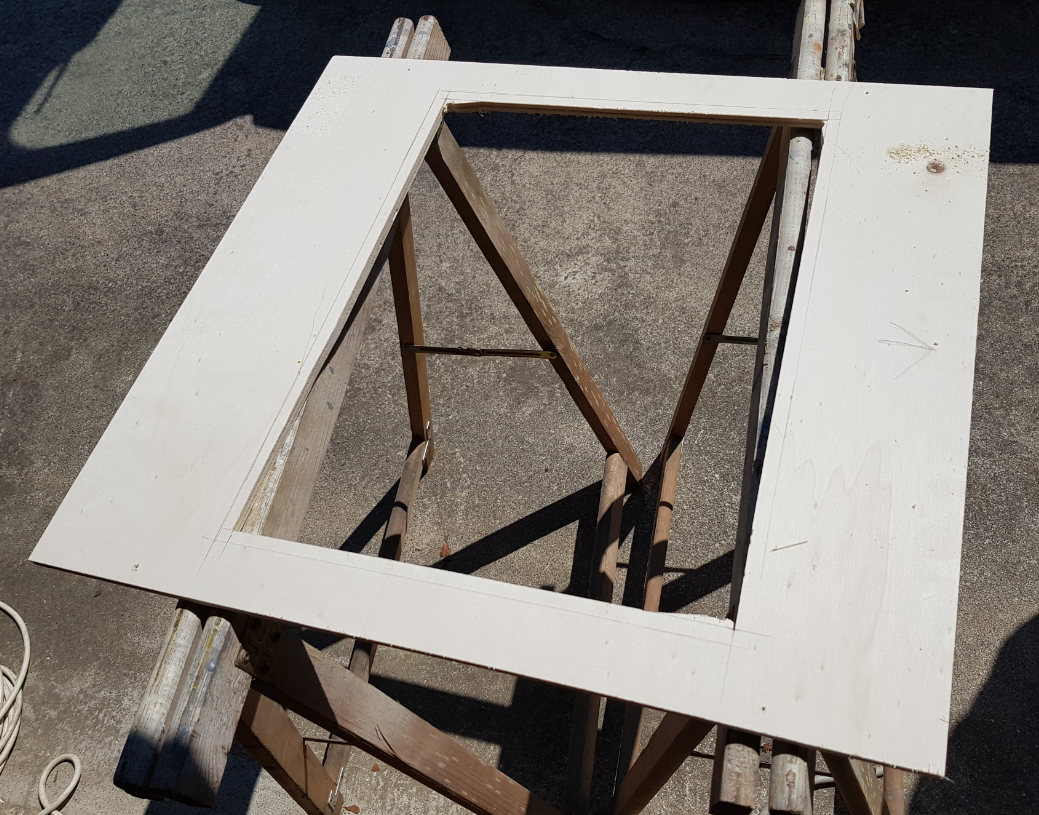
After a very few minutes, what a few moments before was a simple yellow wooden plank now looked for all intents and purposes like the outline of the longed-for arcade cabinet of my dreams:
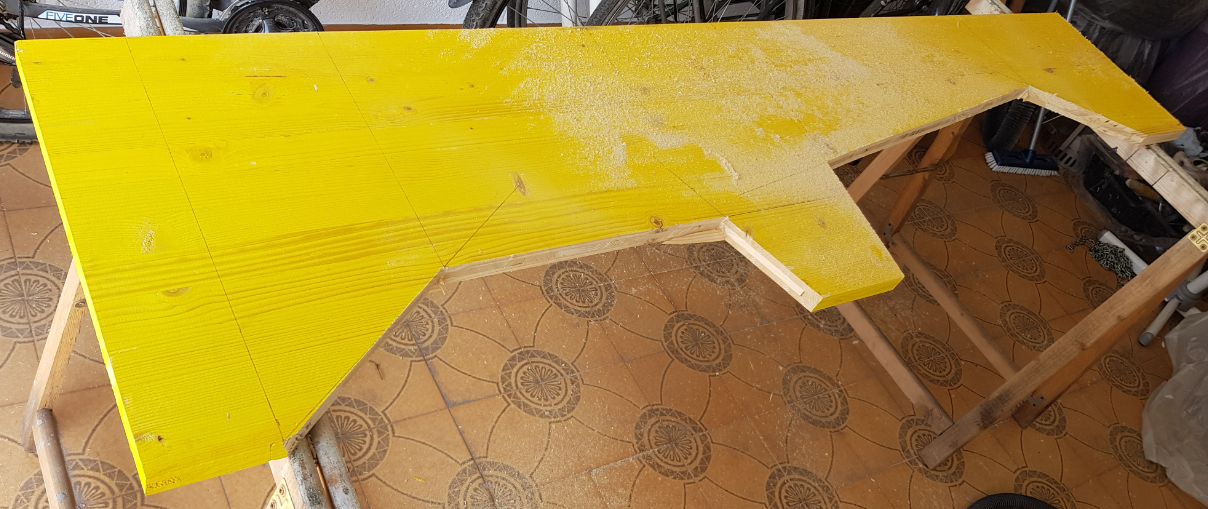
The passing of the circular saw left behind typical traces of its coarse and hasty nature.
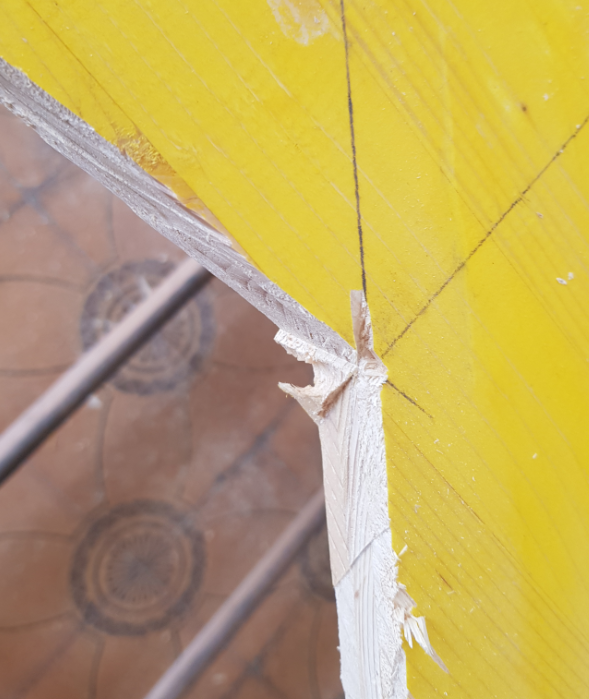
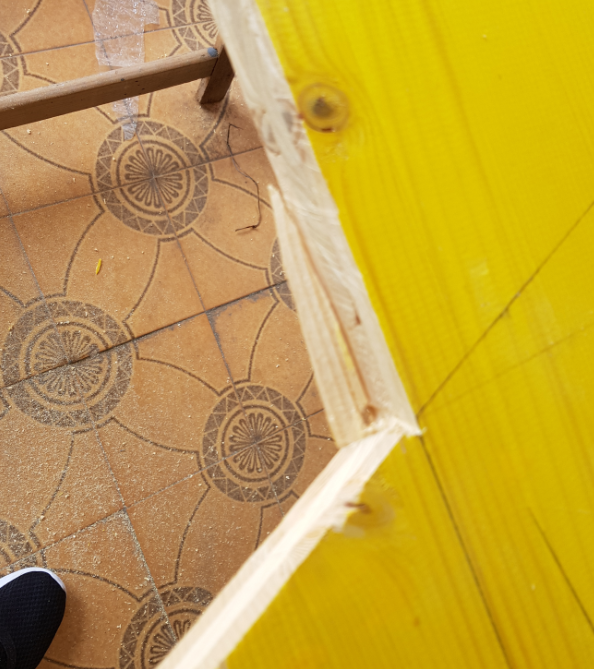
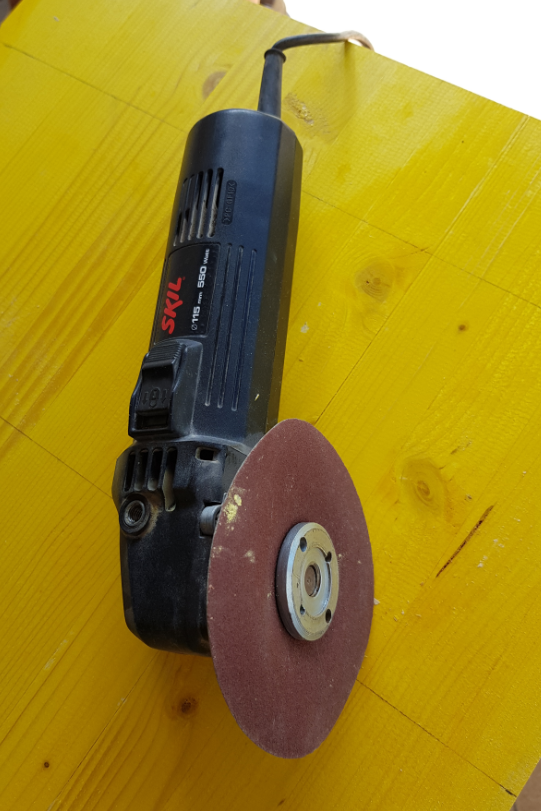
We then unleashed the flex on every detail of the cut that needed a good grinding.
After the other side of the arcade cabinet was done as well, the rest of the cuts were a piece of cake: I would say the measurements out loud and Alberto would get the panel perfectly sized from the 3 remaining yellow planks within seconds.
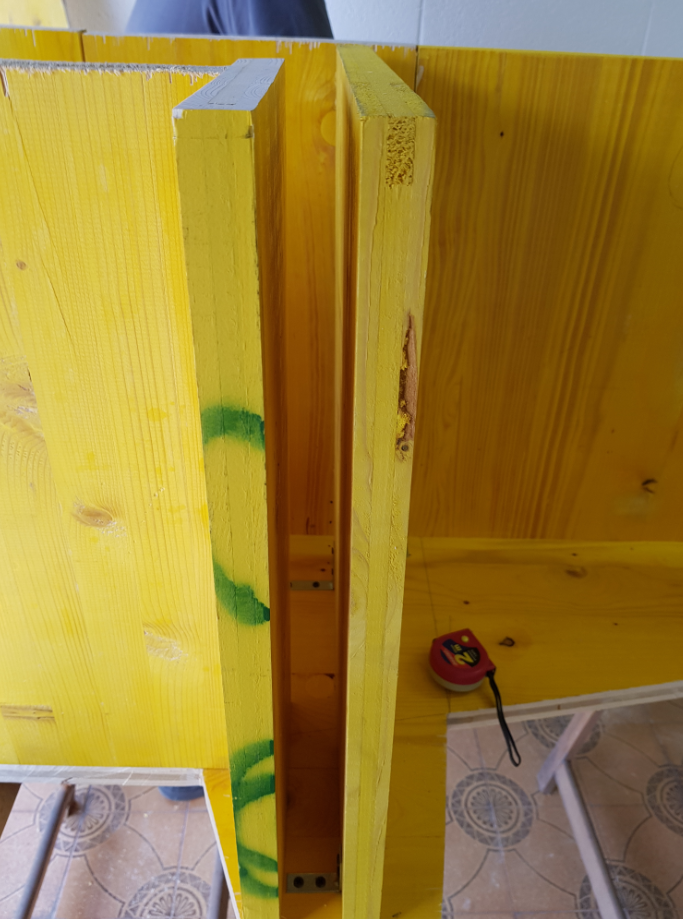
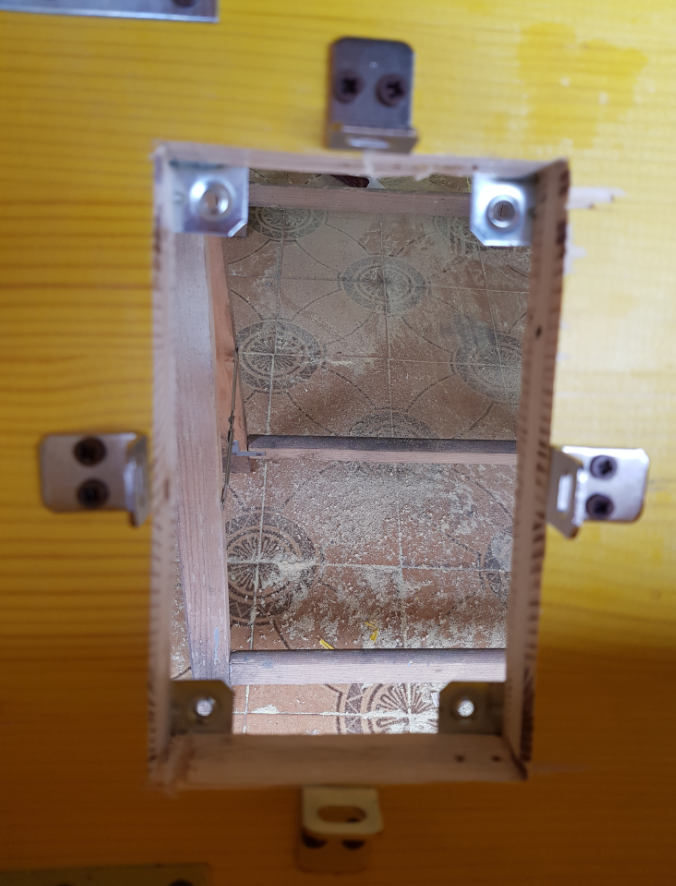
It was finally time to assemble the panels and see if indeed what I had designed was literally standing up.
Given the considerable number of panels involved I decided to do a couple more drawings on paper, very hastily giving each individual panel a number and its placement in the design.

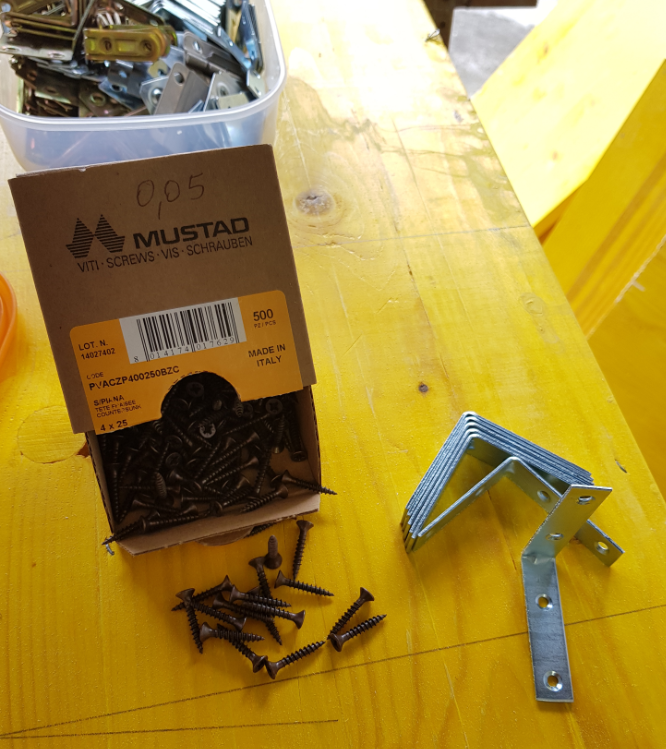
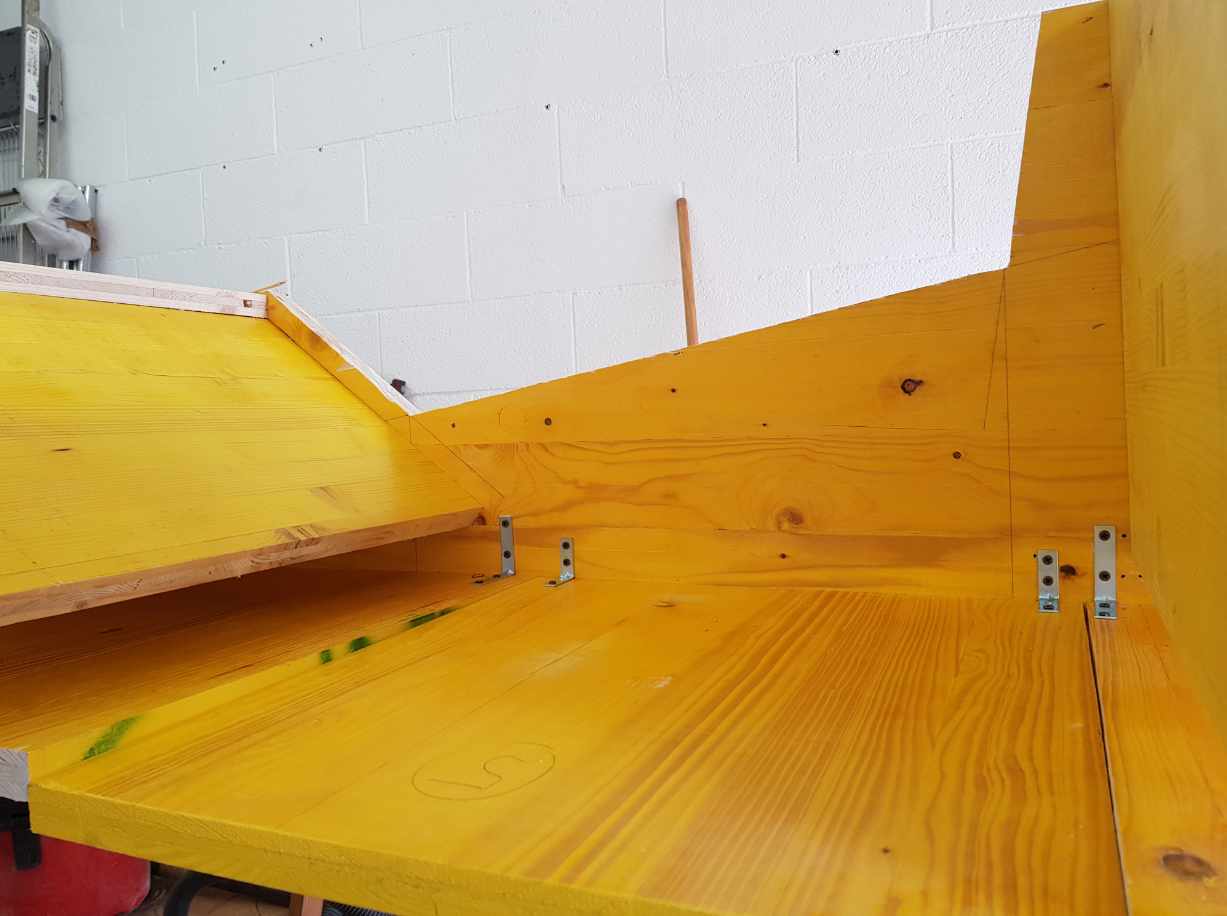
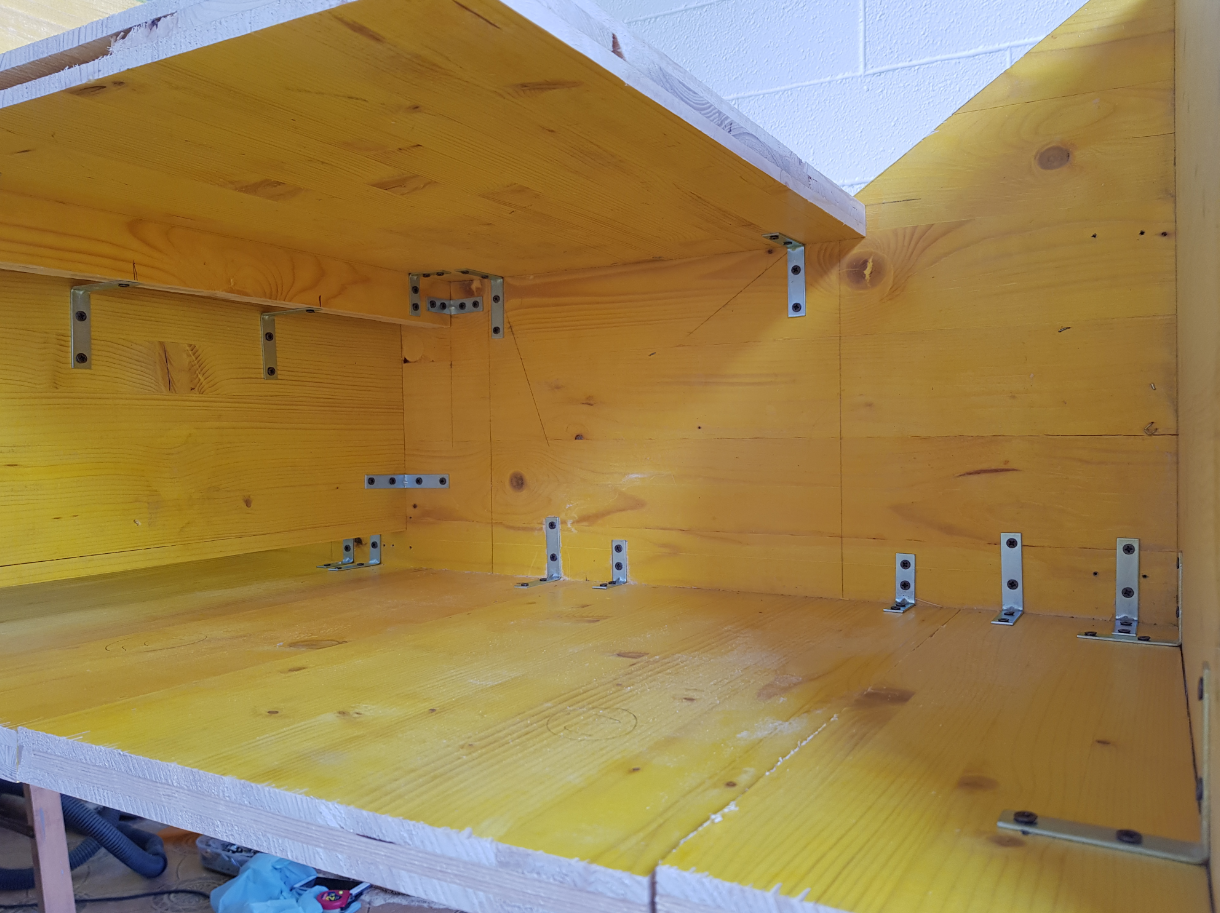
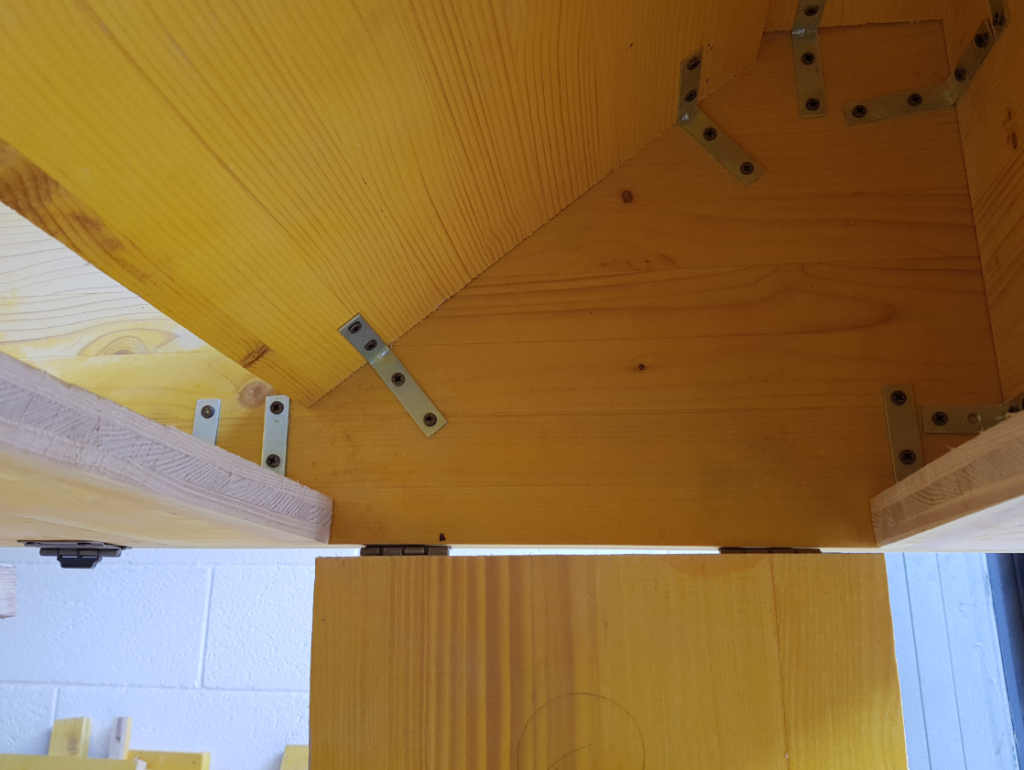
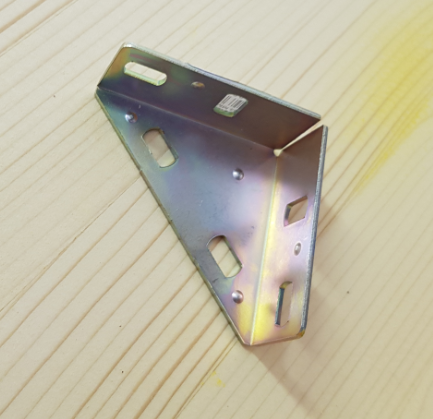
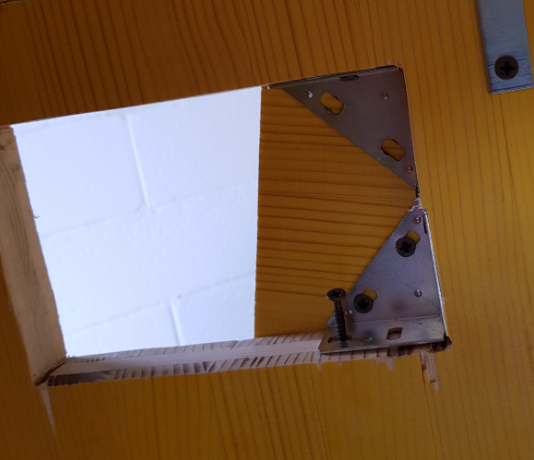
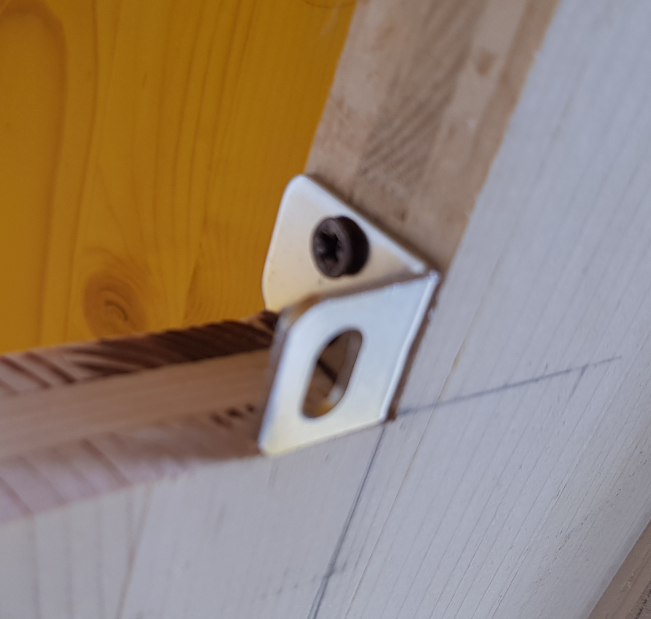
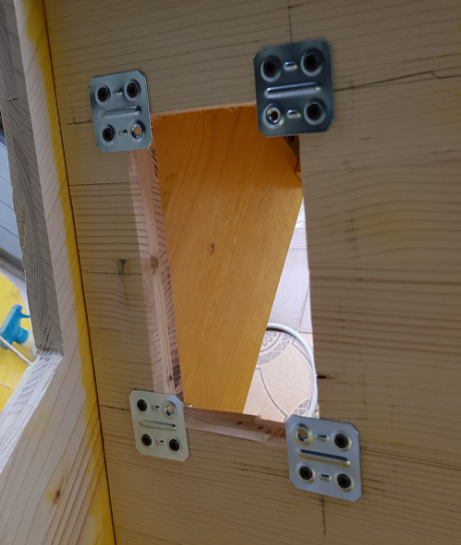
It was early in the afternoon when we began assembling the structure armed with corner plates, and self-threading screws.
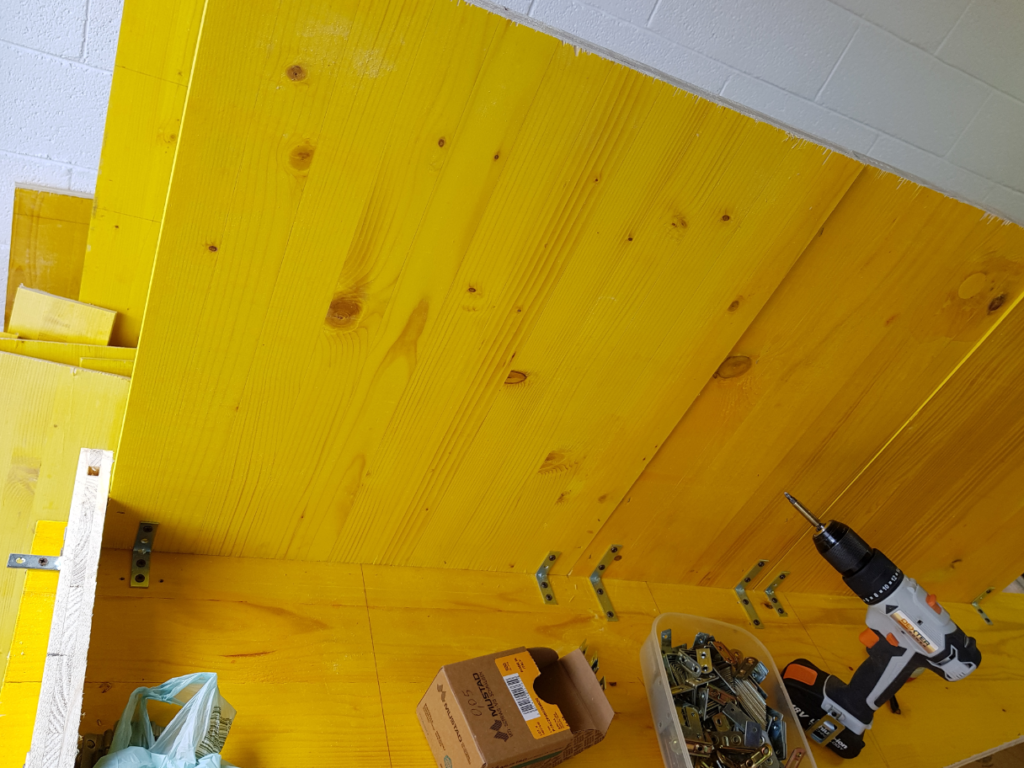
corner plate by corner plate the cabinet was beginning to reveal its mysteries, only guessed at in the design phase, which were now becoming apparent.
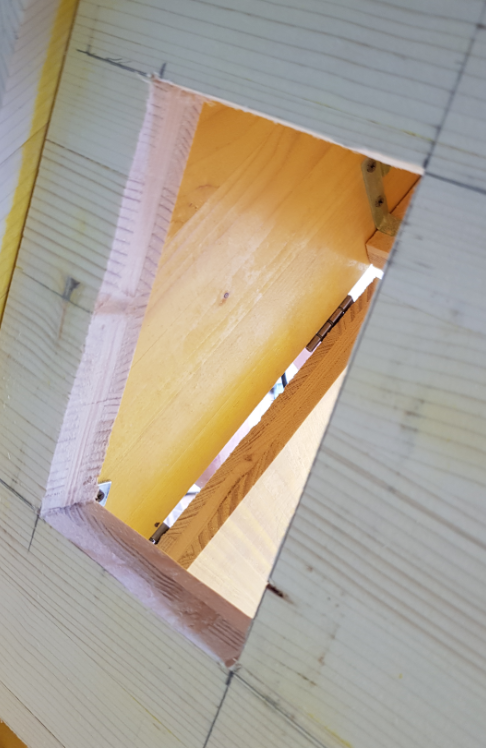
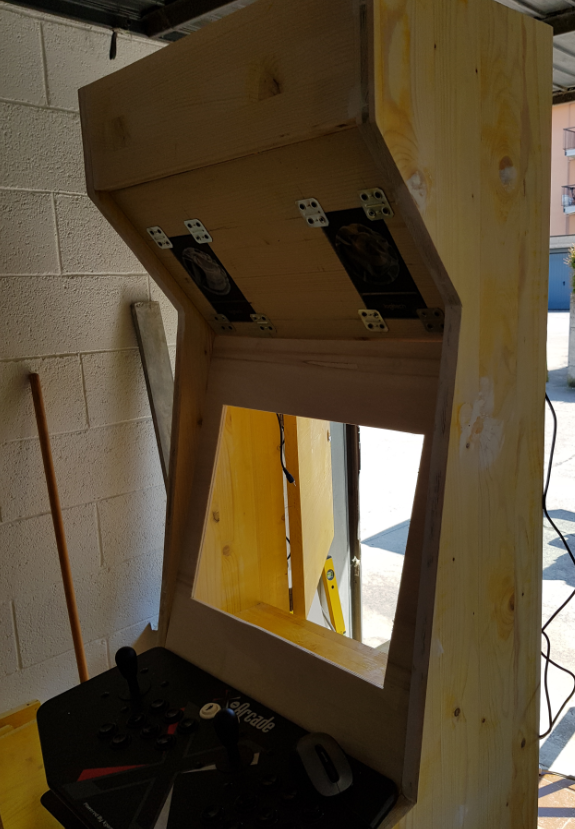
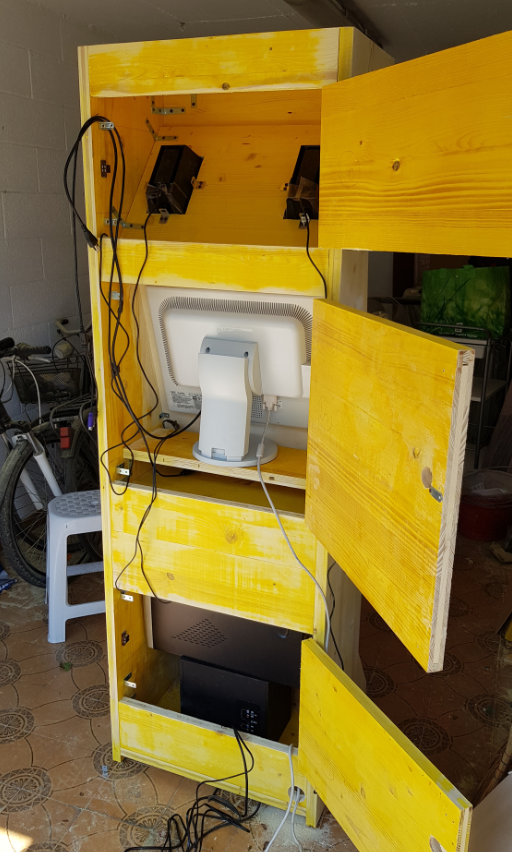
Especially in the design I initially foresaw only 2 rear inspection doors: one for the monitor and the other for the subwoofer and PC compartment.
But now that we were assembling, I realized that the upper part: the speakers compartment, also needed its own inspection door, by the way without this modification it was virtually impossible to assemble the other side.
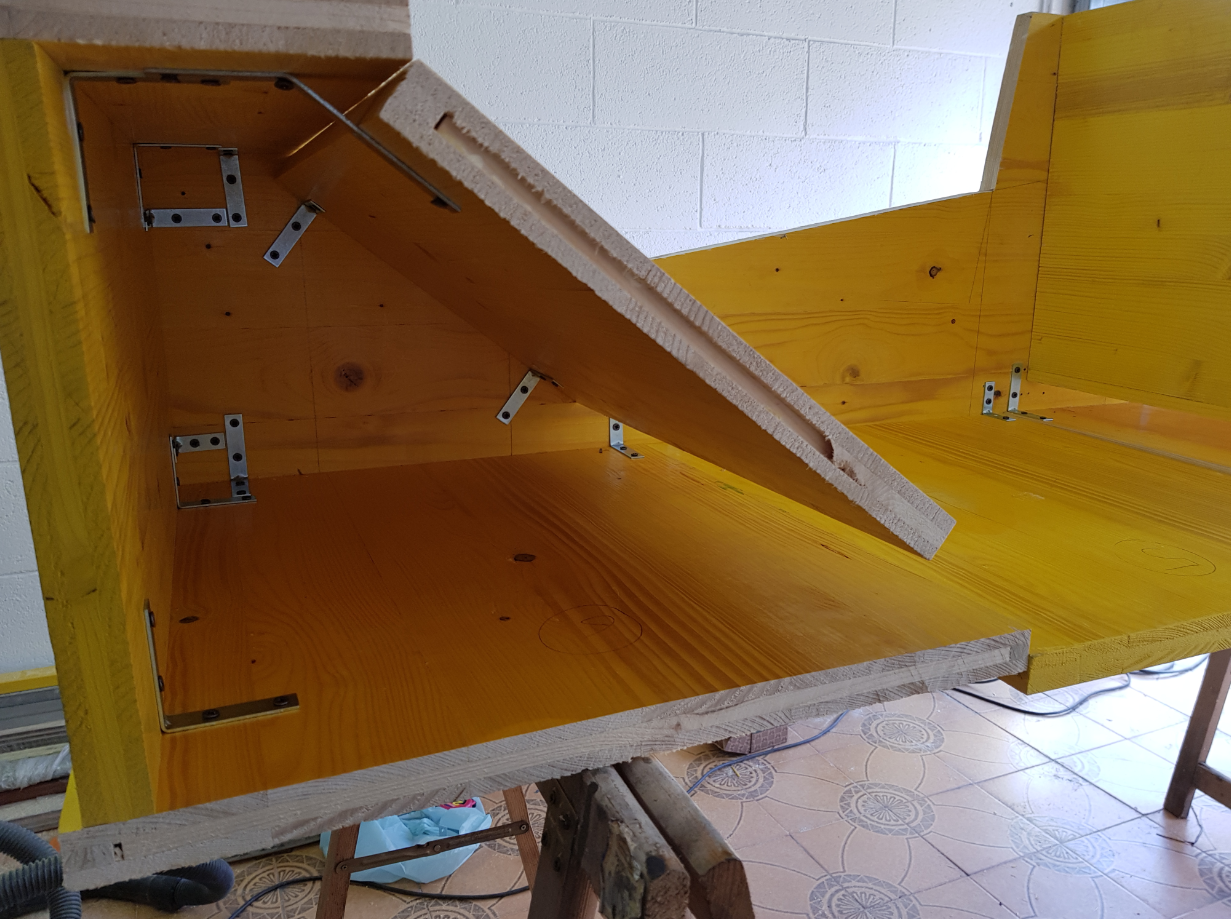
in addition I understood that it was not a good idea to have the lower door rest directly on the bottom of the cabin cruiser, as it could compromise its stability.
I then decided to make the first changes to the design:
- An upper door for the speaker compartment
- A smaller-than-expected lower door in favor of a rigid part between the bottom and the door itself
At a good pace we then began to assemble everything with the new modifications.
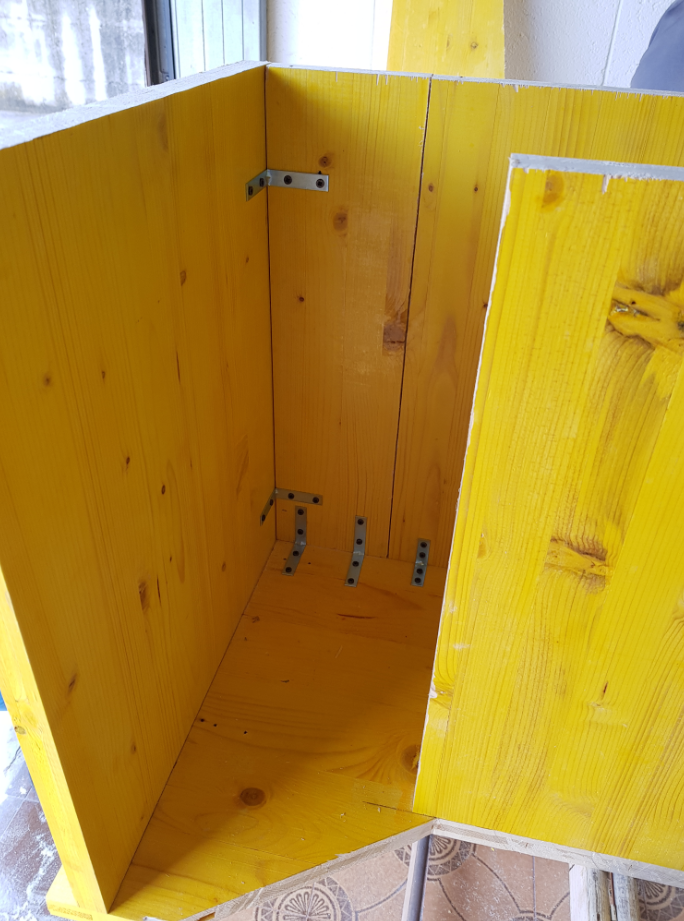
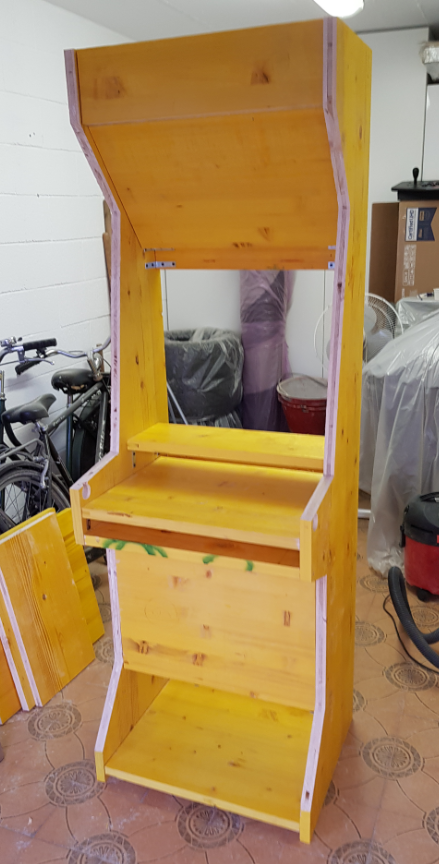
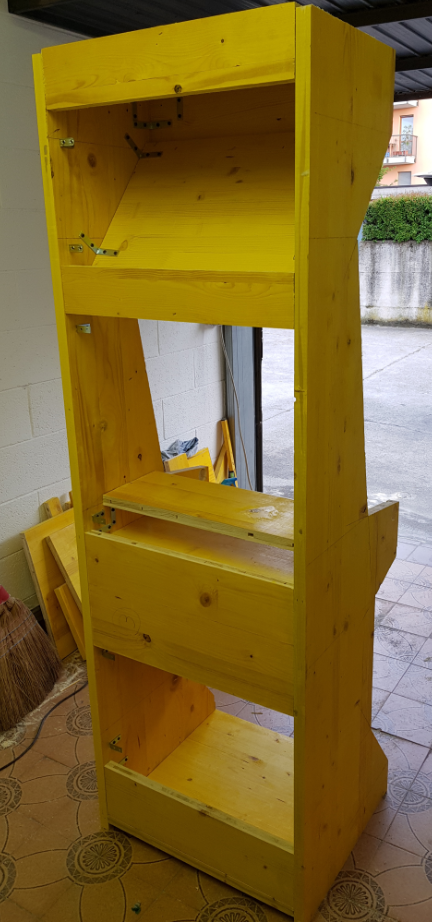
It was not yet evening when after a good hour of intense assembly work it came time to set up our creation. It was a wonderful feeling…
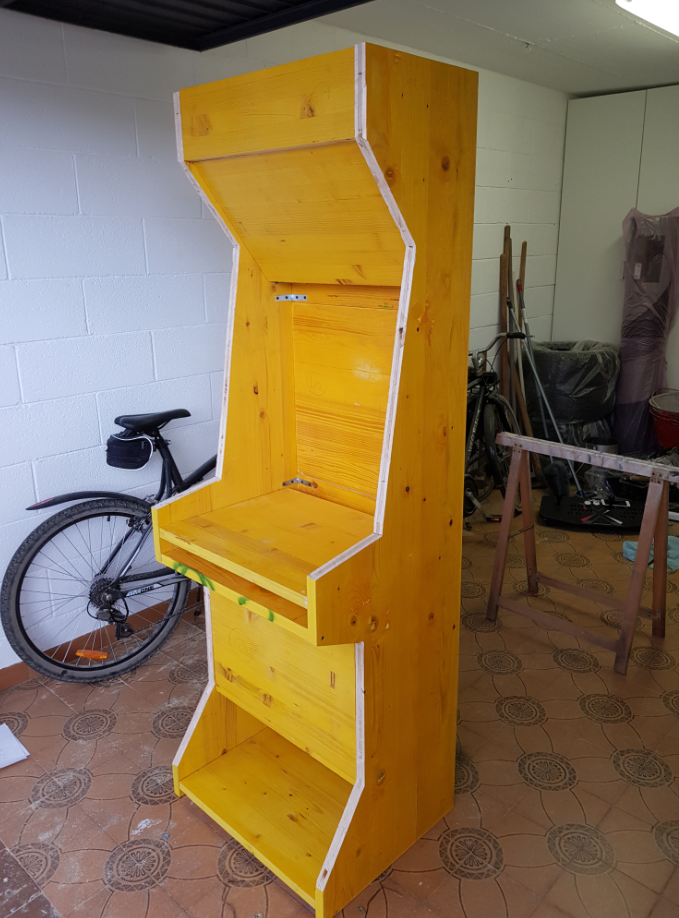
It was there! Our 80 percent. Even Alberto, usually taciturn, let slip a few nods of astonishment. Our creation stood perfectly stable on its “legs” strong with its 185 cm height.
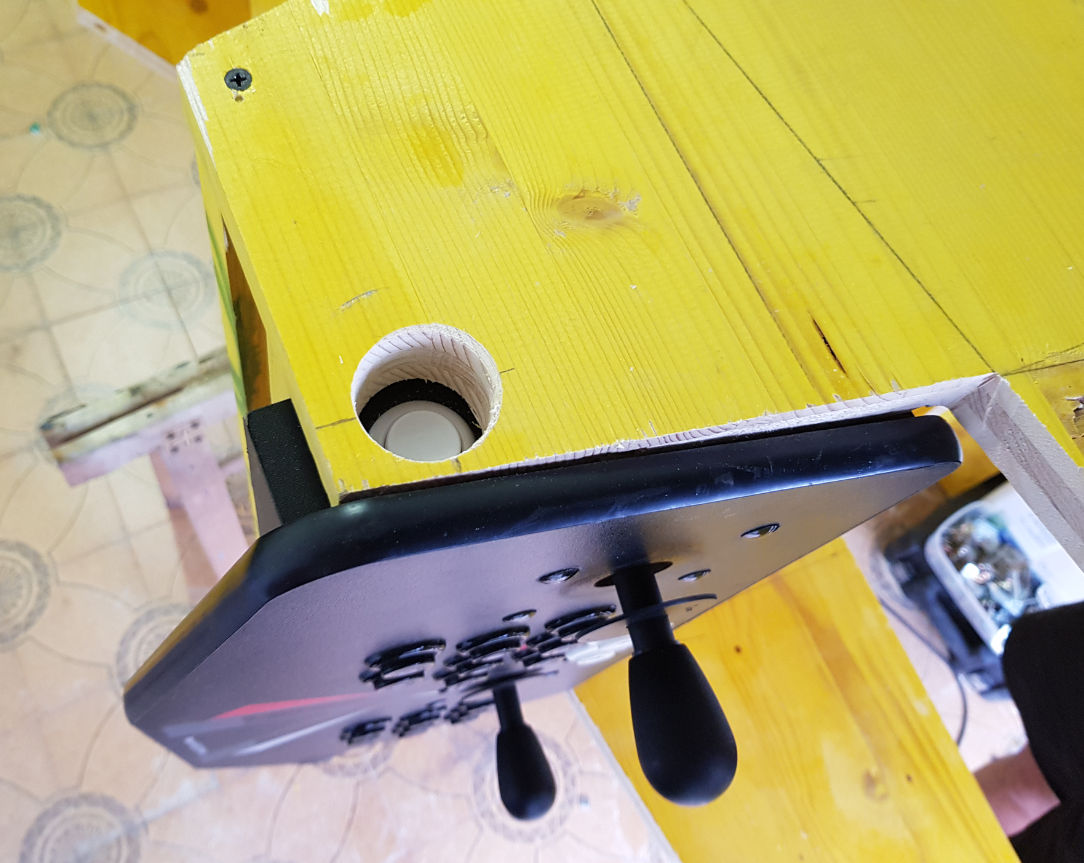
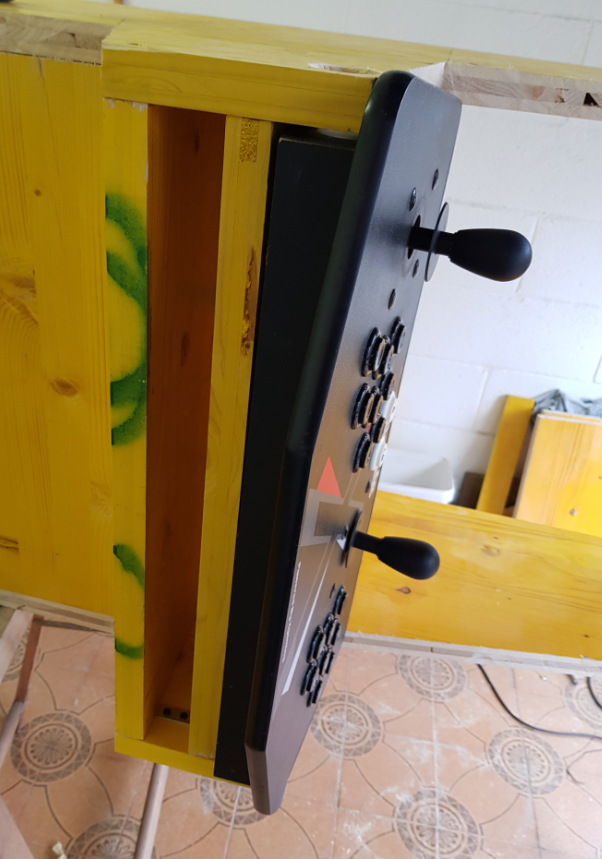
In the wave of the enthusiasm of the results obtained we decided to go on a little longer, arriving at one of the crucial points of the project: the integration of the X-Arcade tankstick.
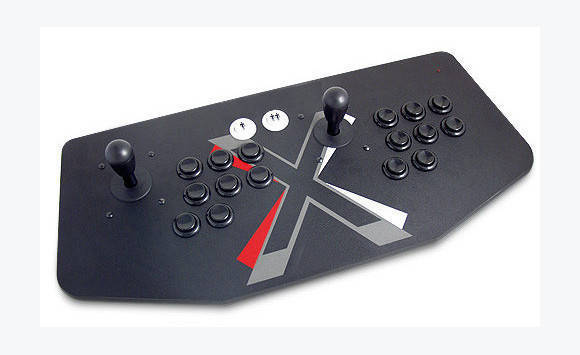
I basically foresaw two holes in the sides of the cabinet to accommodate the side, pinball-style buttons of the X-Arcade, so as to keep it firmly wedged in its slot.
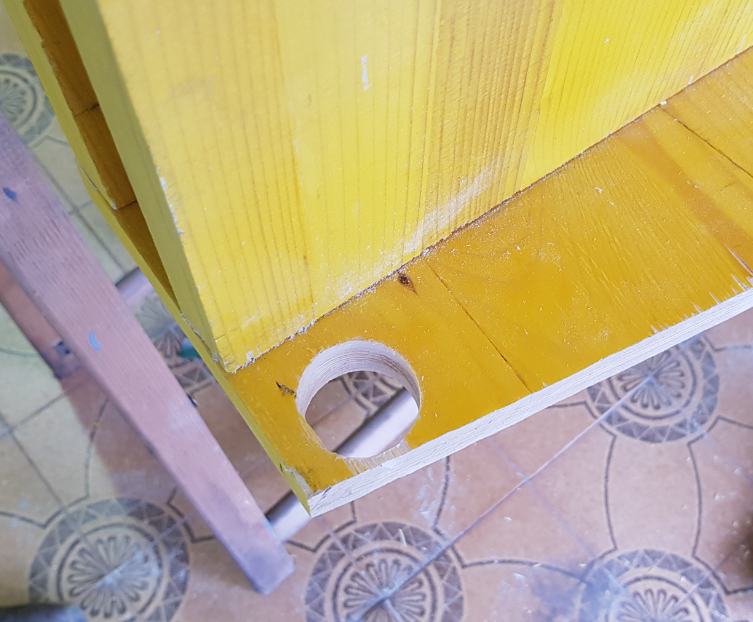
The operation went without a hitch, and the X-Arcade fit perfectly in the space dedicated to it.
The day ended with the full satisfaction of having proved right once again the good Vilfredo Pareto, who unknowingly more than a century ago also spoke a little about our journey.
Day 4 (02/05/2018) – Sandpaper
The fourth day I worked on the cabinet was a Wednesday, being a work day I could only work on it for very few hours in the evening.
Alberto recommended that I sand the panels so as to remove the yellow part, which contains oily substances, to improve the subsequent application of the glaze.
Who knows why I imagined I had to do everything by holding simple sheets of sandpaper, elbow grease and lots and lots of patience. In reality, however, that evening I found a nice tool waiting for me: the sander!
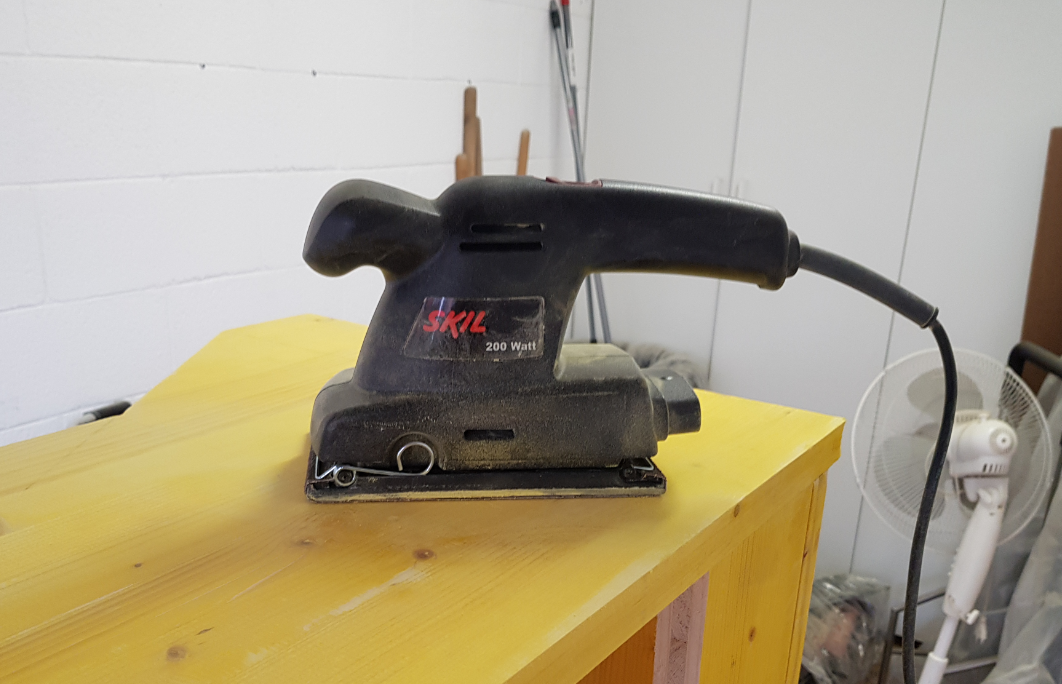
Quite a noisy device but definitely effective! In a little over an hour I could admire its efficiency.
Day 5 (05/05/2018) – Quick and easy
Finally came a Saturday to devote entirely to the cabinet. I rose early and found Alberto already in the garage ready for a new day of crafting challenges, and believe me, there was no shortage of challenges and problems to solve that day!
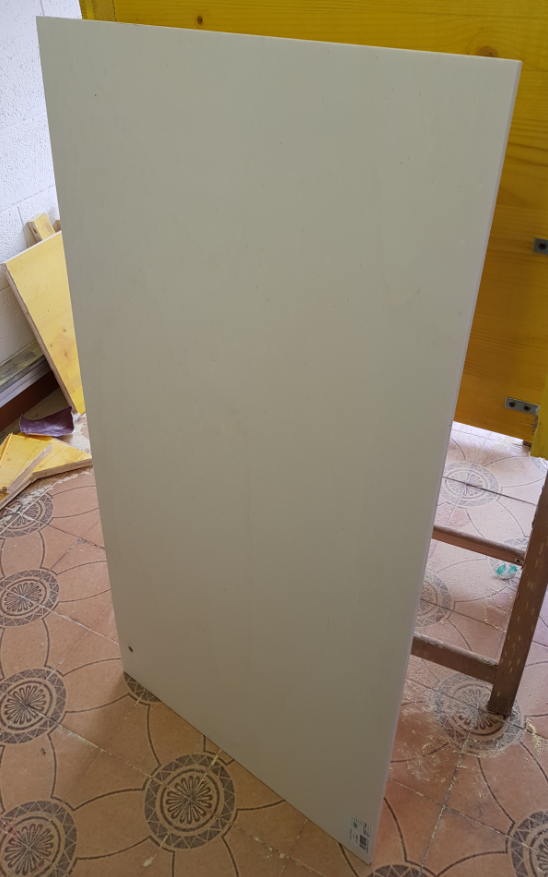
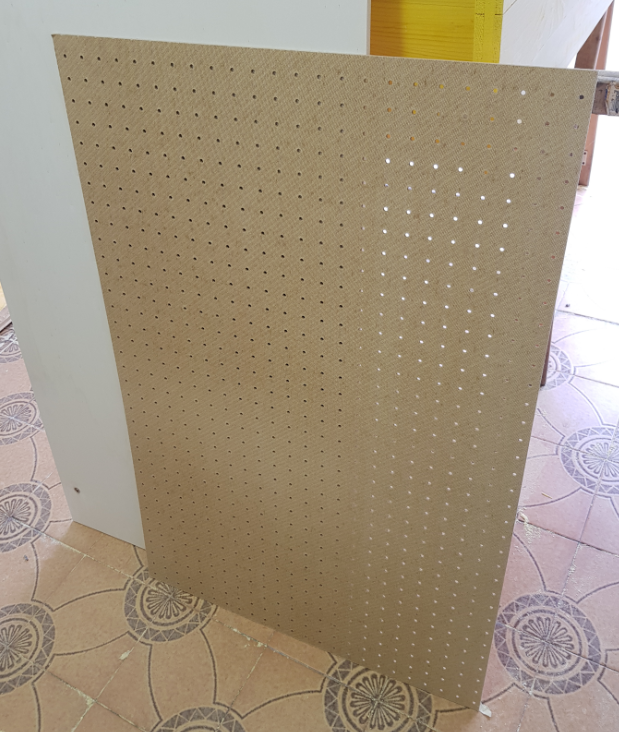
Before setting to work we went to purchase the last 2 panels needed for assembly, namely: the monitor frame and the lower perforated panel for ventilation.
For the time being we decided not to cut the new panels, waiting until we had clearer ideas.
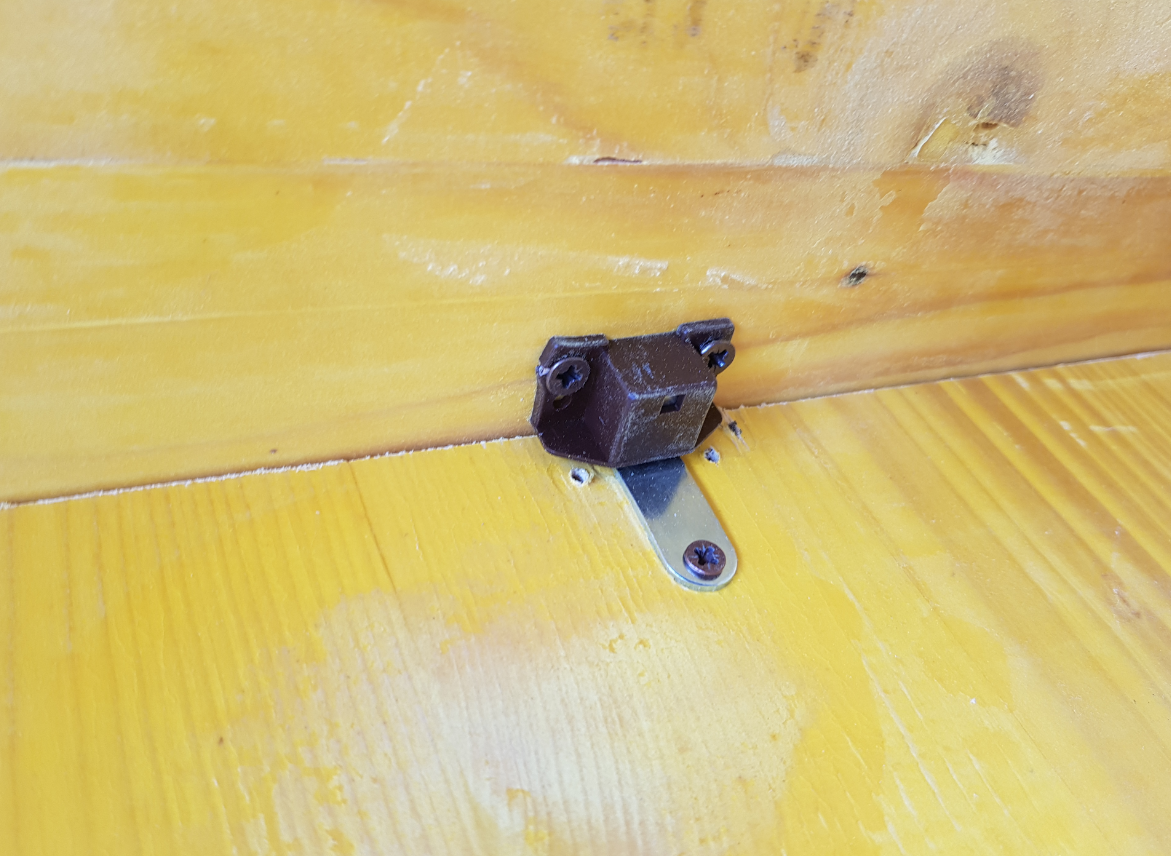
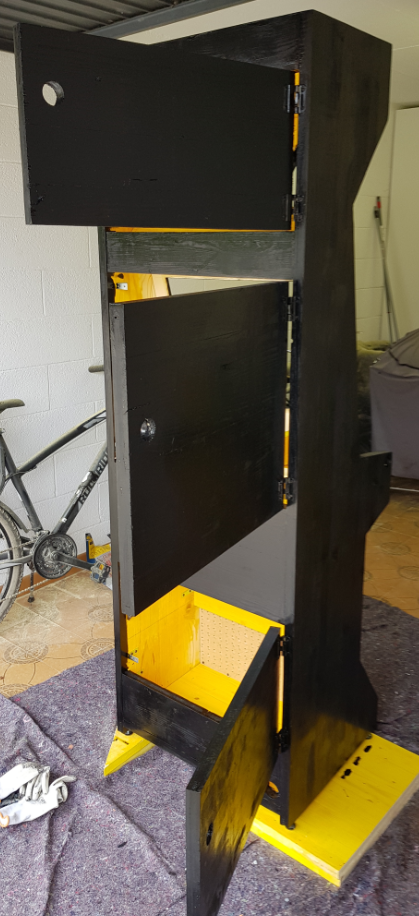
We then decided to assemble the 3 rear doors using a pair of hinges and one magnetic door catch per door.
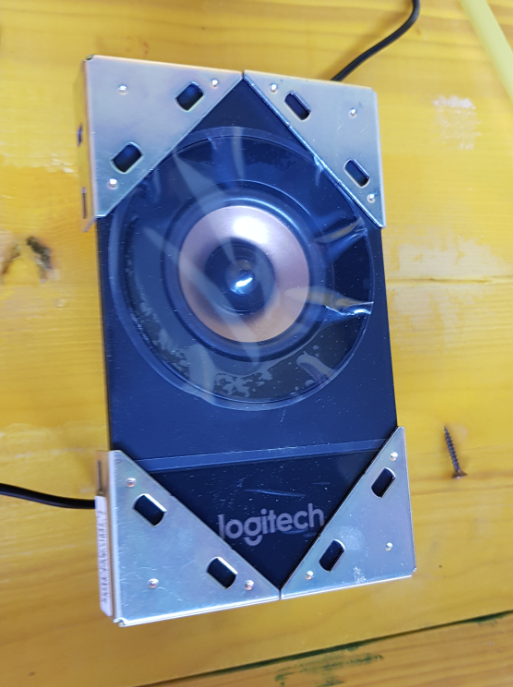
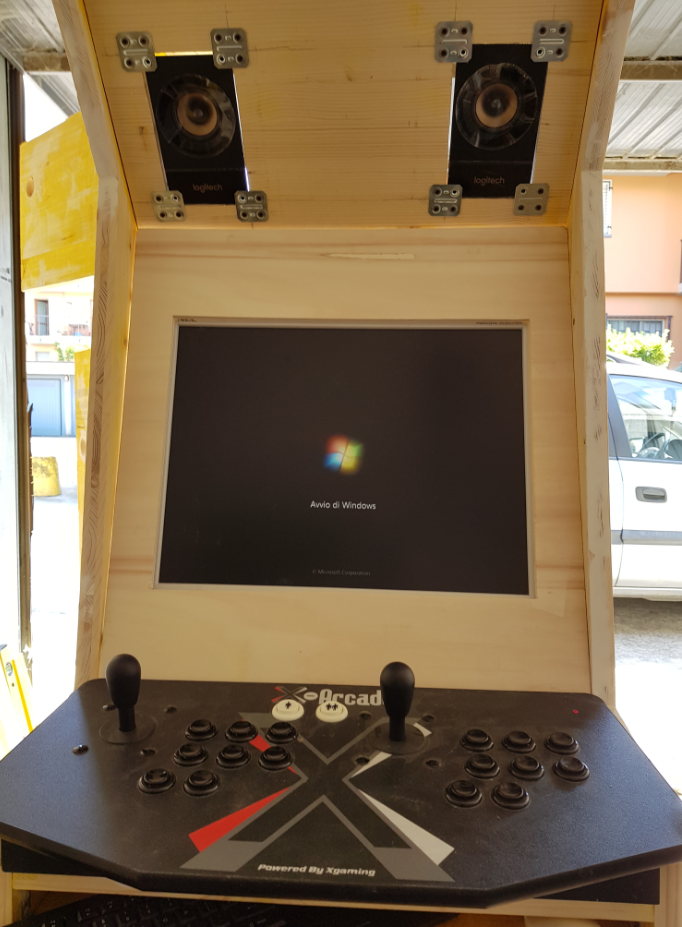
Next we began what we imagined to be a fairly quick and easy operation: the holes to hold the speakers at the top of the cabin cruiser.
A few days earlier I ordered online a 2.1 speaker system from Logitech (exactly the Z533 model) in line with the design I wanted to give the cabinet.
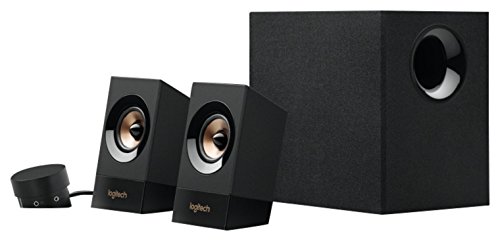
The initial idea was to use angle brackets, screwed into appropriately sized holes, to hold the speakers in place.
Quick and easy we thought …
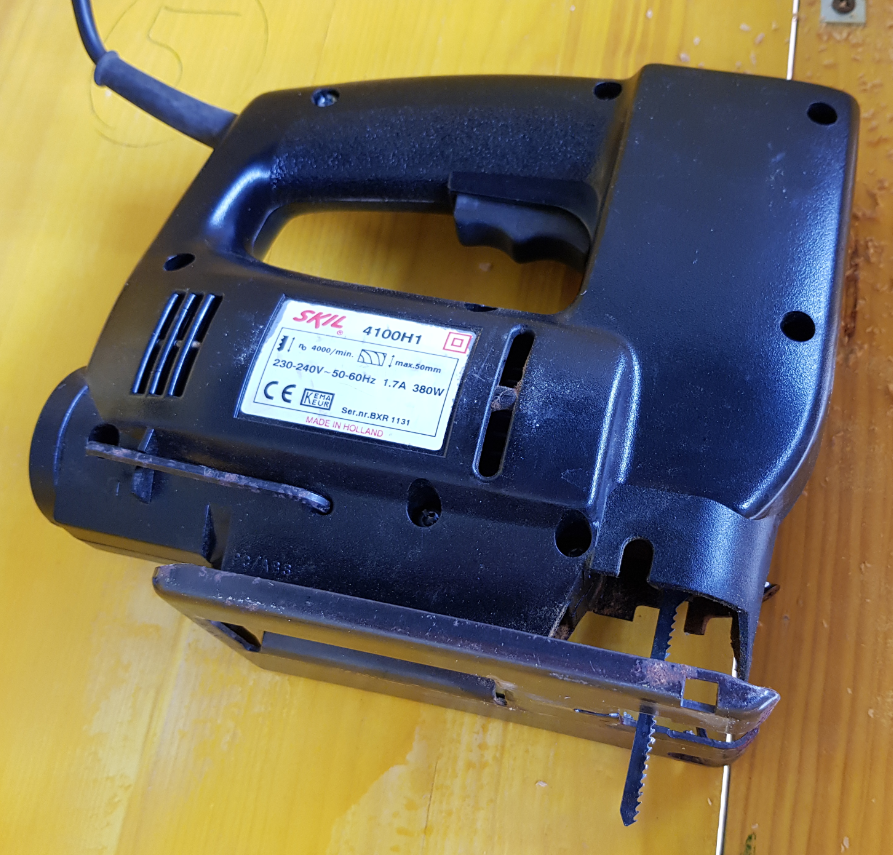
We drew the track for the cut directly on the cabinet and drilled holes with the drill to allow the jigsaw tip to get into position.
And here the first problems began. The jigsaw blade is quite flexible and, accomplice among other things the thickness of the wood, the cuts came crooked and not perfectly perpendicular to the panel.
At first we did not pay too much attention to it and proceeded as planned … it was a disaster!
We inserted the brackets into the holes trying hard to keep them perpendicular but nothing seemed to work.
We then tried another approach: small angle brackets instead of the large ones we used before.
It was the same unsuccessful result … the jigsaw’s crooked cuts irreparably compromised the reliability of the inner part of the hole.
The solution came in the afternoon, after a hearty lunch: instead of dogging the inside of the hole, we decided to take advantage of flat brackets screwed directly onto the surface of the panel.
It worked like a charm!
We devised a system to hold the speaker pressed against the brackets by simple plastic ties.
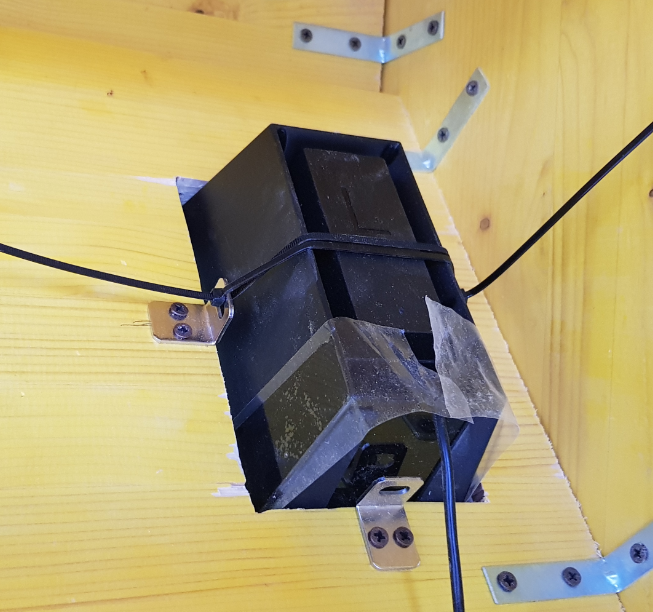
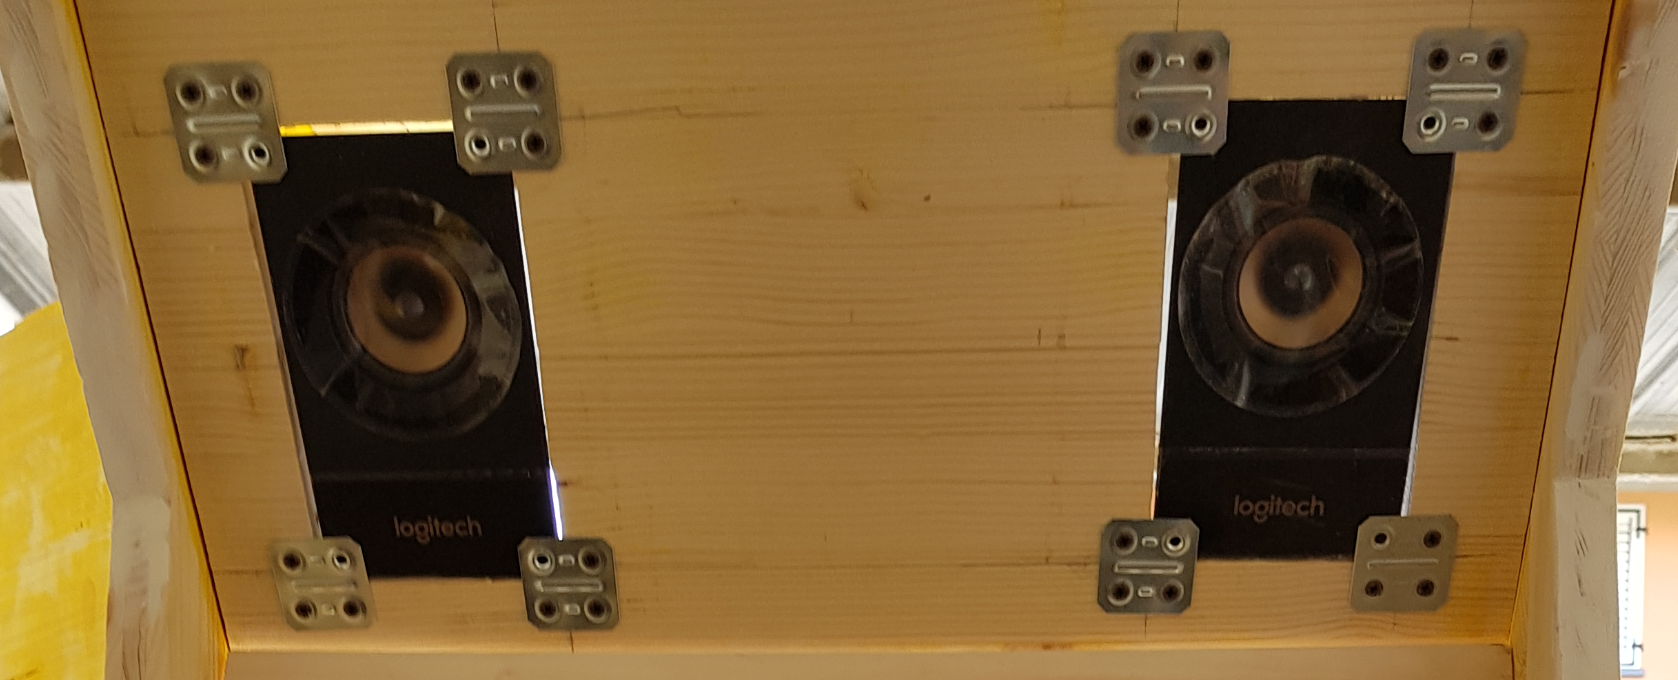
Finally, those damn speakers stood firmly in place!
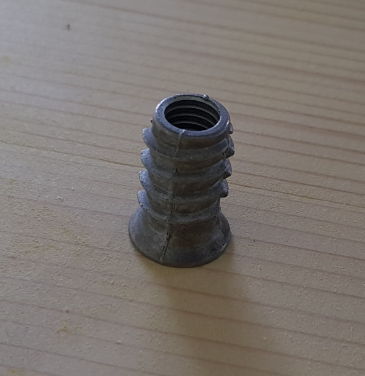
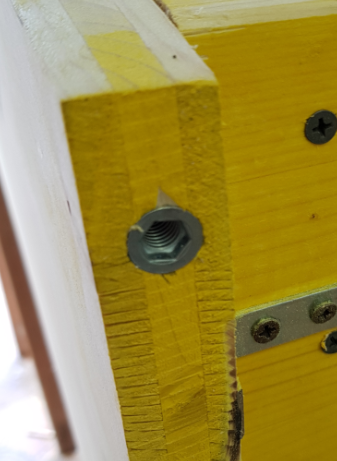
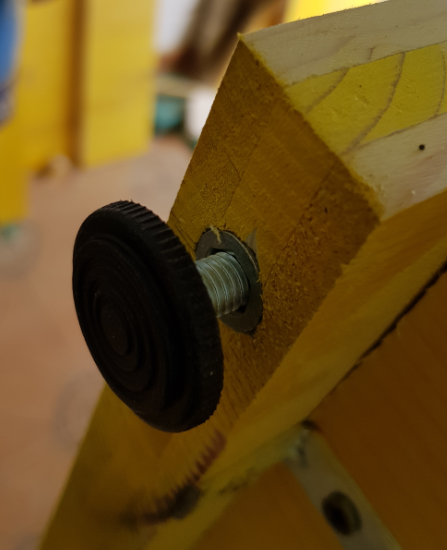
Before ending the day, on the strength of our victory, we decided to give “real” feet to the cabinet. We used 4 threaded inserts and as many adjustable feet.
A job, this time truly, quick and easy 🙂
Day 6 (09/05/2018) – Stucco
Another Wednesday evening’s work on the cabinet arrived, and the task was extremely simple: apply stucco to all parts of the wood that were not smooth and intact.
A job more of patience, simple and quite long.
In those days I began to share my initiative with some colleagues, who began to follow my progress through my stories (verbally, not on social media), usually on my lunch break.
Day 7 (12/05/2018) – First power on
That Saturday was another milestone in our story, for at the end of that day I saw my arcade cabinet “alive” for the first time!
But let’s proceed in order.
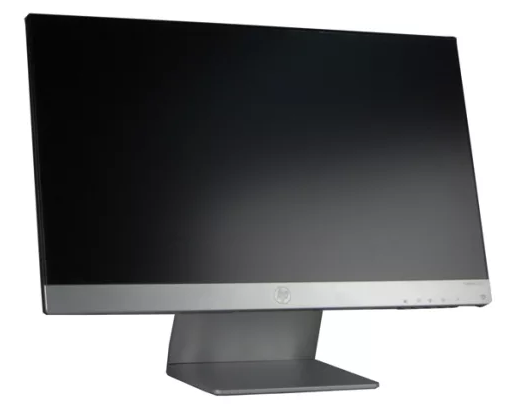
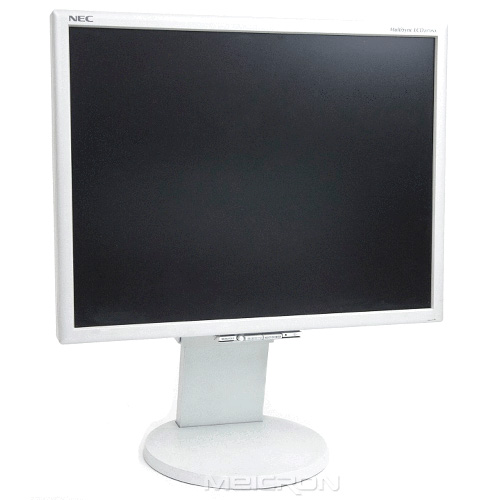
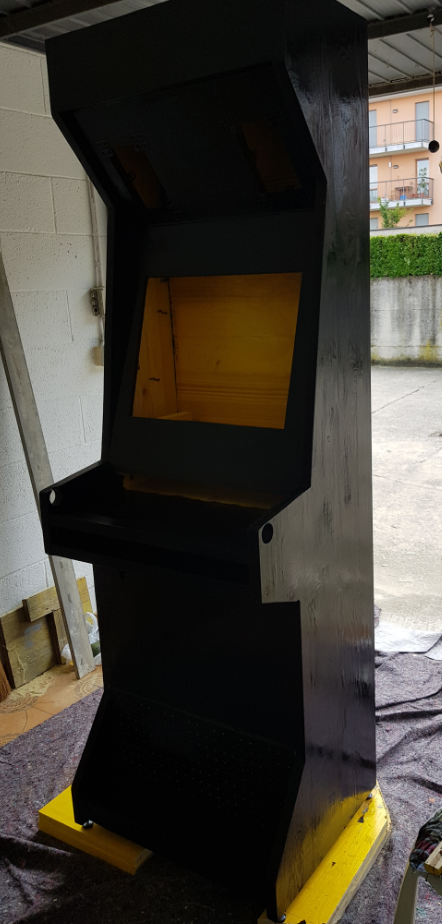
In the design phase I foresaw a salvage monitor: a 23-inch LCD that I no longer used: an HP Pavillion 23xi.
Days before I thought and rethought about the choice of monitor, and the fact that a 16:9 monitor was an obvious waste of space, both horizontally and vertically since almost all arcade-era games ran on 4:3 CRT monitors.
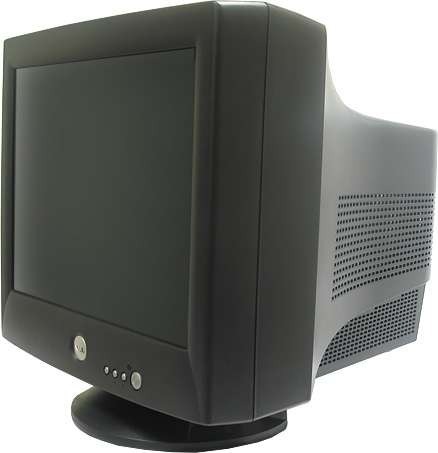
Since by the time you read these words the acronym CRT will be a matter of computer archaeology here is a nice picture of a glorious example of a cathode ray tube i.e. a CRT
Not wanting to betray one of my initial decisions, which was to NOT use CRT monitors, I began to search the Internet for the largest possible 4:3 LCD, which was somewhat of a rarity, since it was precisely during the advent of LCDs that they went from 4:3 to 16:9 proportions in PC screens.
After days of searching I finally found a 4:3 LCD a good 21″, more specifically I found a NEC MultiSync LCD2170NX.
We first tried installing the new monitor in the dedicated space to see if everything continued to remain stable.
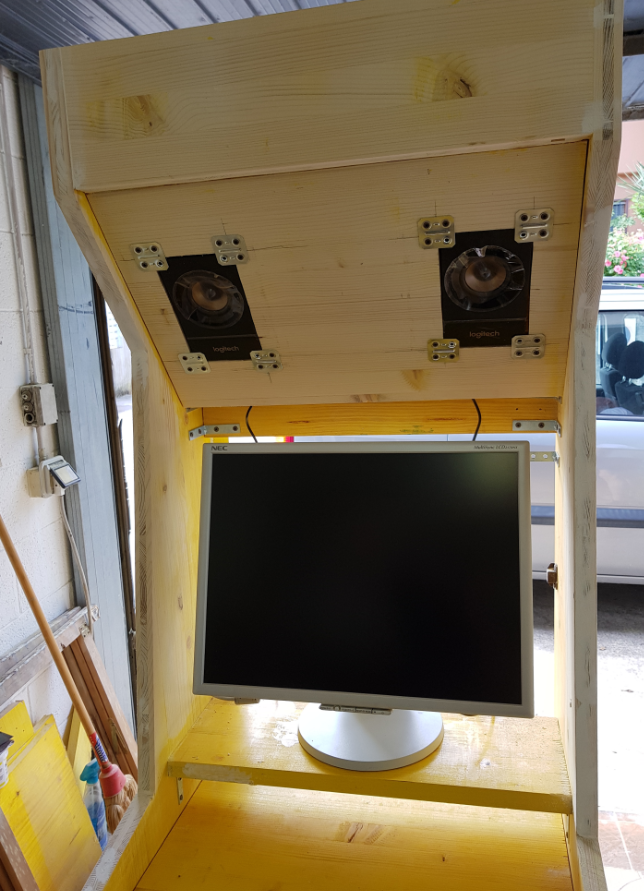
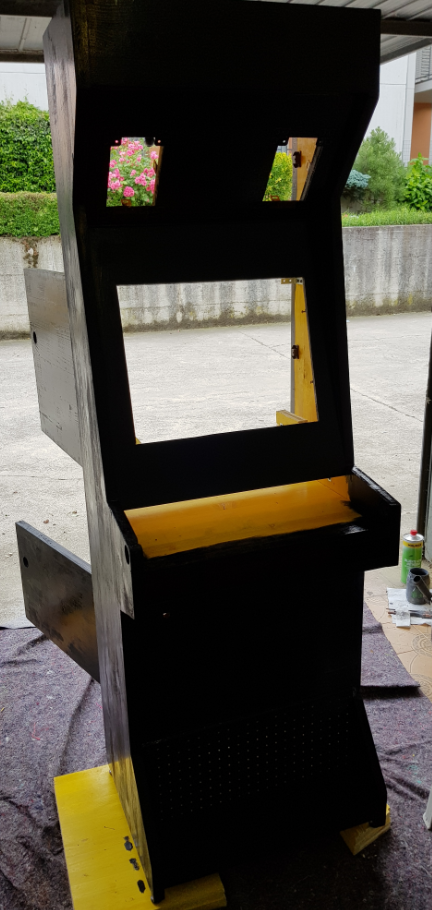
Smooth as silk! The base of the monitor fits perfectly into the elevation I had designed for the previous monitor, so I redesigned and sized the frame for the monitor and began cutting the thin wood panel I had purchased specifically for the purpose.
All that remained was to try to assemble the frame to see if all the calculations were correct, and to do this in the best way possible we also reassembled the X-Arcade tankstick on which the frame was to rest internally.
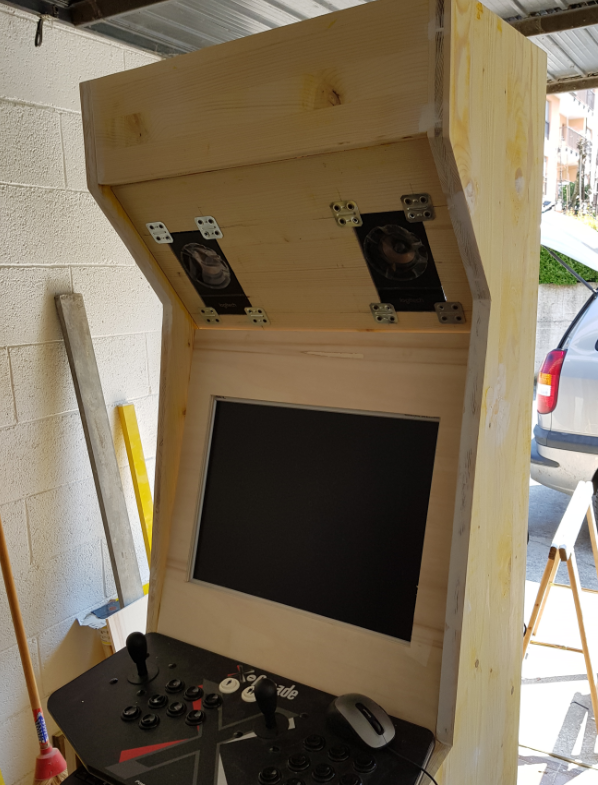
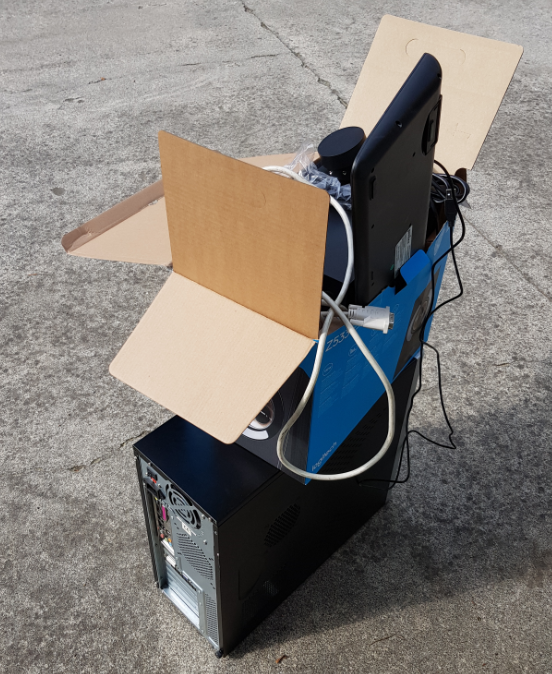
The perfect match between screen and frame exhilarated us to the point that we decided to try to fit all the rest of the electronics and make an attempt to power up that same day!
I took the PC, subwoofer and all the rest, brought it into the garage and meticulously began to make all the wiring.
When everything was ready I turned to Alberto and said, “Shall we turn it on?” with attached quote, and with an ounce of anxiety I then turned on that old PC.

At first the whirring noise of the PC’s power supply made me worry a little, but after a few moments here came the Windows logo, which never looked so good now towering in the center of the screen.
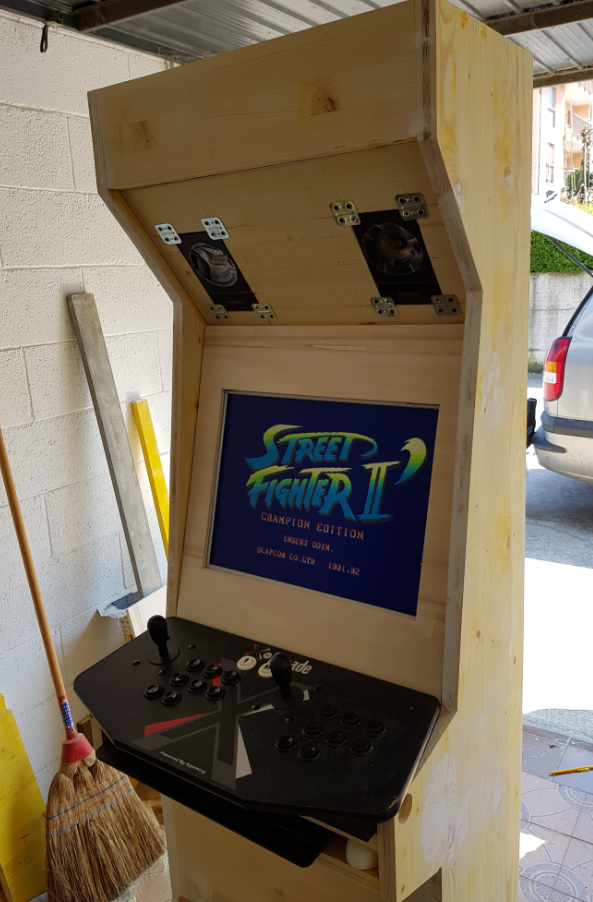
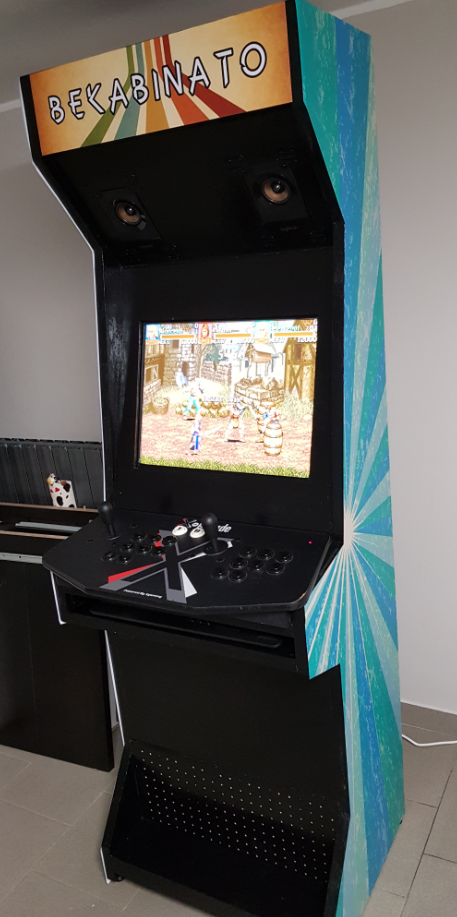
I immediately loaded the MAME with an enviable Rom Set with more than 6000 games but above all with THE game, the origin of everything, the one without which this whole story would never have existed: Street Fighter 2 – Champion Edition.
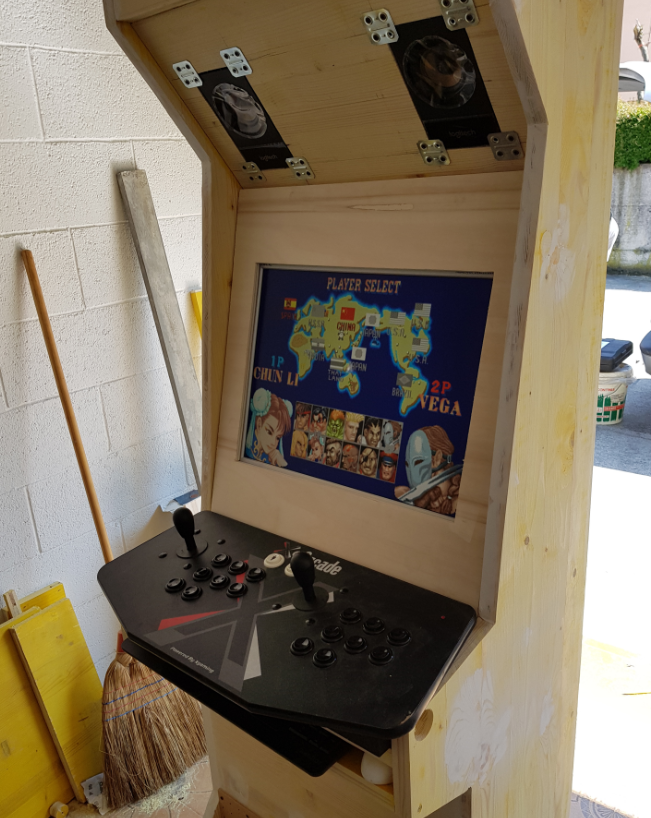
After one of the best games of my life at SF2 strictly with Chun-Li, before declaring that fantastic day over, I decided to load up on another game that had marked my passion for arcade cabinet and arcades: The King Of Fighter ’97, exactly the version of KOF that I used to play during recess at the arcade near my high school.
In case you were wondering: back in my school days, my KOF’97 team was Korea! Starring (for some reason):
- A Taekwondo fighter (okay, that fits)
- A mega fat convict with a proverbial lead ball on his foot (???)
- Sort of a dwarf version of Freddy Krueger (????????)

In short… THE BEST!
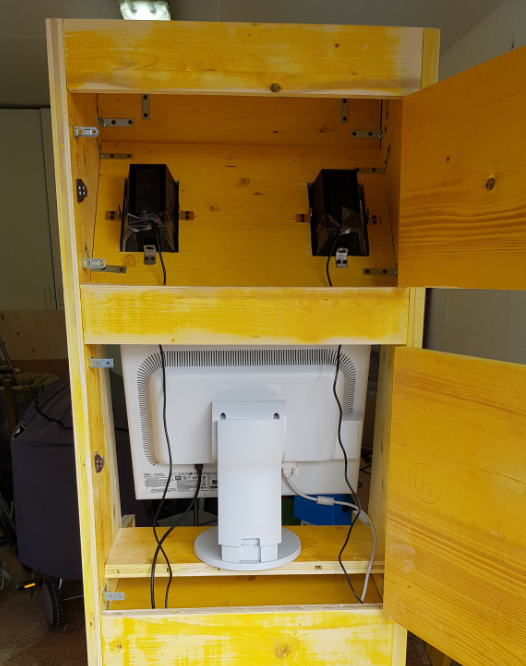
Day 8 (14/05/2018) – Interlocking
The monitor I chose to use in the cabinet had incredible adjustability… even too much! In fact it could be adjusted not only in height, but also in rotation on as many as 3 axes! It could basically go from landscape to portrait simply by rotating it. It was necessary to design a way to keep it in the correct position!
In an admittedly somewhat too artisanal manner, Alberto and I reused some of the scrap from the cuts of the various panels to create a kind of cage composed of various sections:
- (1) – Slide to secure the monitor base.
- (2) – Side support bars to maintain height and a pivot axis
- (3) – Locking blocks to keep the monitor resting against the window and tightened the last 2 axes of rotation
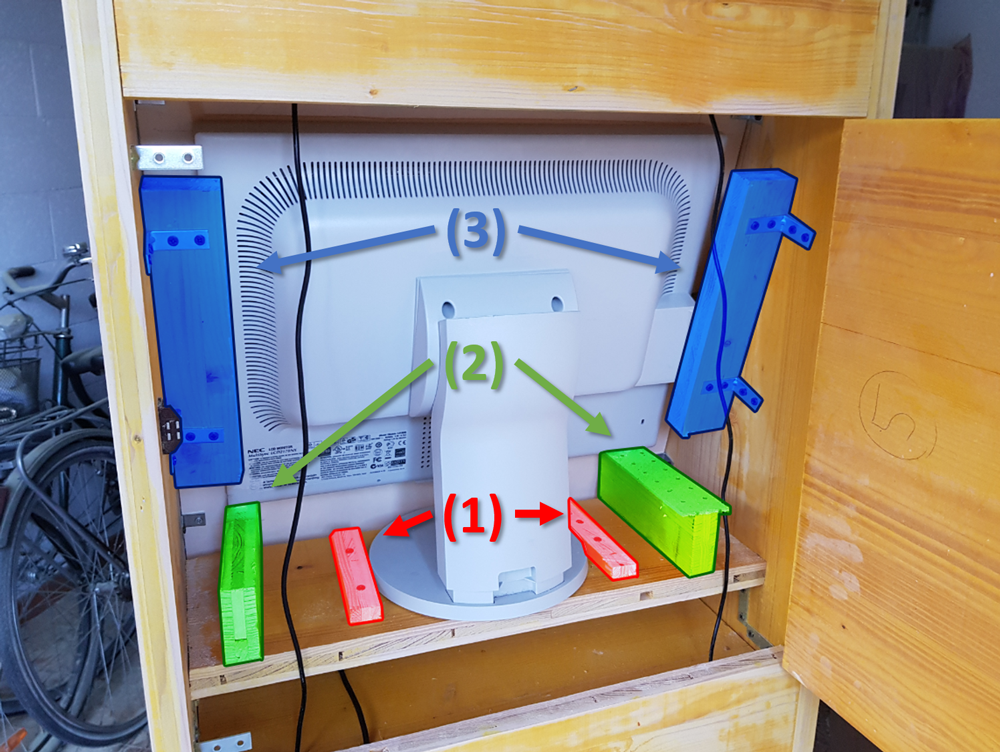
I looked at that handcrafted but very functional solution with some disappointment, but Alberto quickly pressed on, saying, “It’s inside, who can see it?” finding no good reason to make it more aesthetically pleasing, I resigned myself to the effective ugliness of our monitor cage.
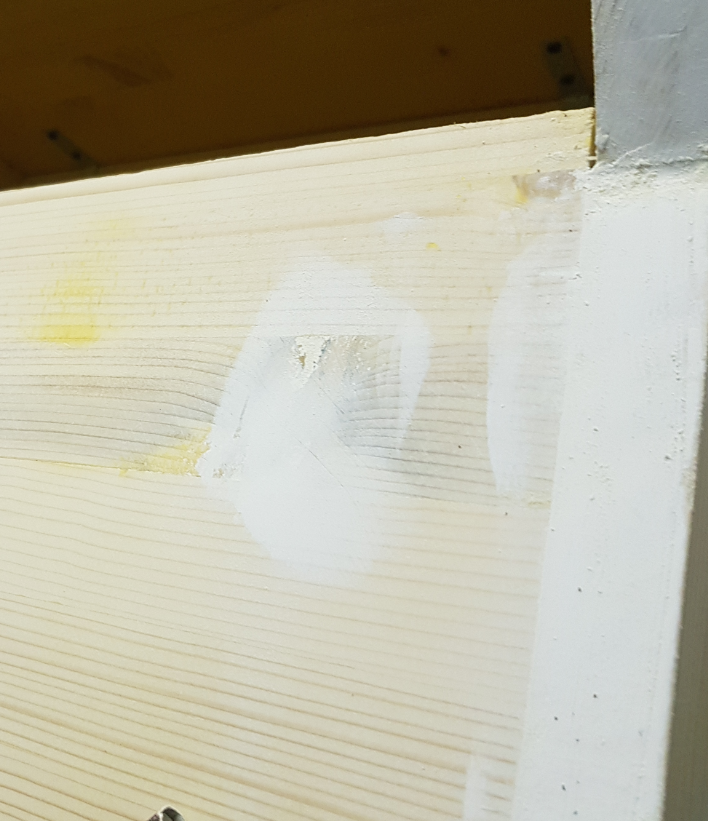
Day 9 (18/05/2018) – Stucco 2
Now that everything was in place, it was time to give the second and final coat of stucco, going to fill all the joints between panels and make the rough or damaged parts of the wood as smooth as possible.

A lot of stucco, a lot of patience…but that passed, too.
Day 10 (19/05/2018) – Escamotage
Before removing all the electronics from the cabinet to begin unwrapping and painting it, 3 technical problems remained to be solved:
- A system for nimbly browsing more than 6,000 games
- Adjusting the audio volume in some way
- Turning the cabinet on and off
The problem of browsing and selecting a game within MAME was not trivial, we are talking about an interface with thousands of titles where you can apply different kinds of filters and of course write part of the name of the game to find it more easily.
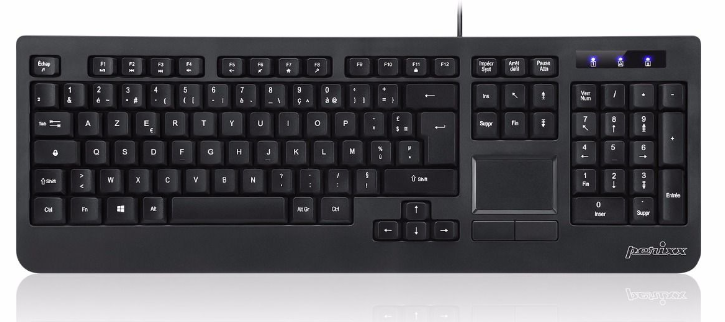
Two of the fixed goals that I initially gave myself were to use a hidden keyboard and not to use any device with batteries, the latter point for me was crucial since I aimed to have an arcade cabinet that could be functional even after a long time of inactivity, to reconcile all that I decided to use a wired keyboard with a built-in touchpad, specifically the Perixx PERIBOARD-513II model
As for the keyboard housing in the design phase I foresaw a dedicated space just below the X-Arcade.
As for audio, the system I chose to use had an external adjuster.
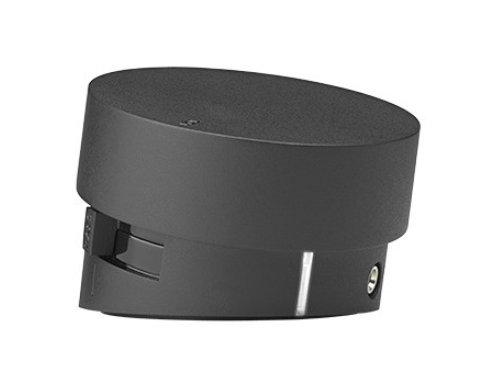
The adjuster, in addition to setting the volume and bass output, was able to turn off the sound system completely; in fact, it was enough to turn the volume to minimum to hear a click that corresponded with complete shutdown.
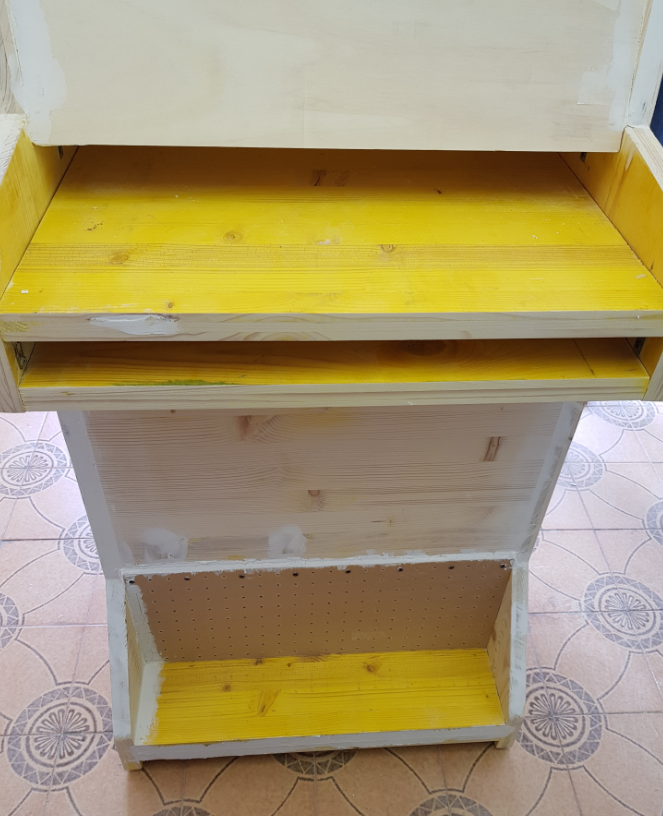
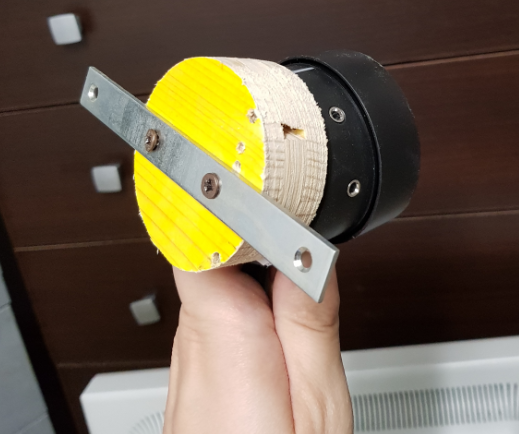
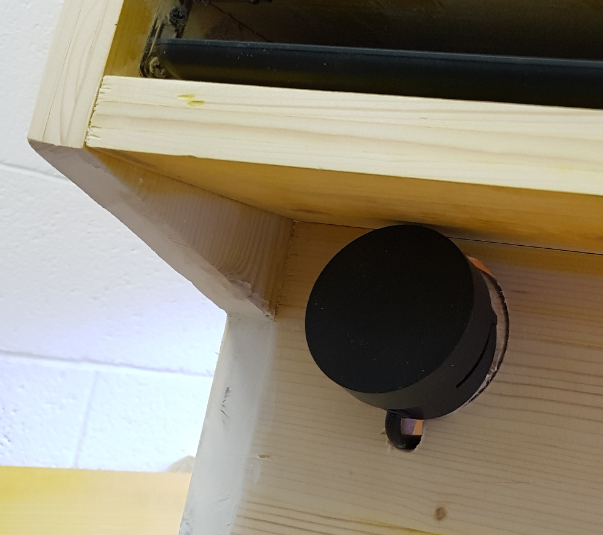
In order to integrate it with the cabinet, we made a small change to the design, providing a small, custom-made hole just below the keyboard compartment.
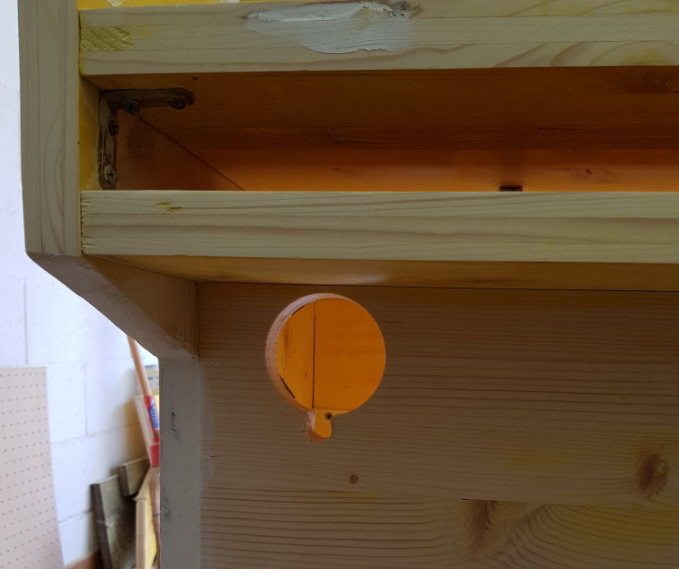
We used the scrap from the round hole to create a clamping support for the regulator, again crude but very effective.
That left the last point: the power-on system of the cabinet.
The initial idea was to take advantage of a feature in the BIOS of my old PC called Wake on Keyboard, which allowed the PC (and thus also the cabinet) to be turned on with a single keystroke, unfortunately that old BIOS was only able to recognize the keystroke from a keyboard connected via PS/2, an old standard now in disuse for connecting keyboards and mice, in any case the keyboard I chose to use was connected via a USB port, consequently a program change became necessary.
To solve the problem I exploited a little escamotage: I took advantage of a particular BIOS feature called Restore on AC Power Loss, which in simple terms defined how the PC would behave if the power was restored following a blackout; I then set the Power On option, as in “turn back on if the power comes back on.”
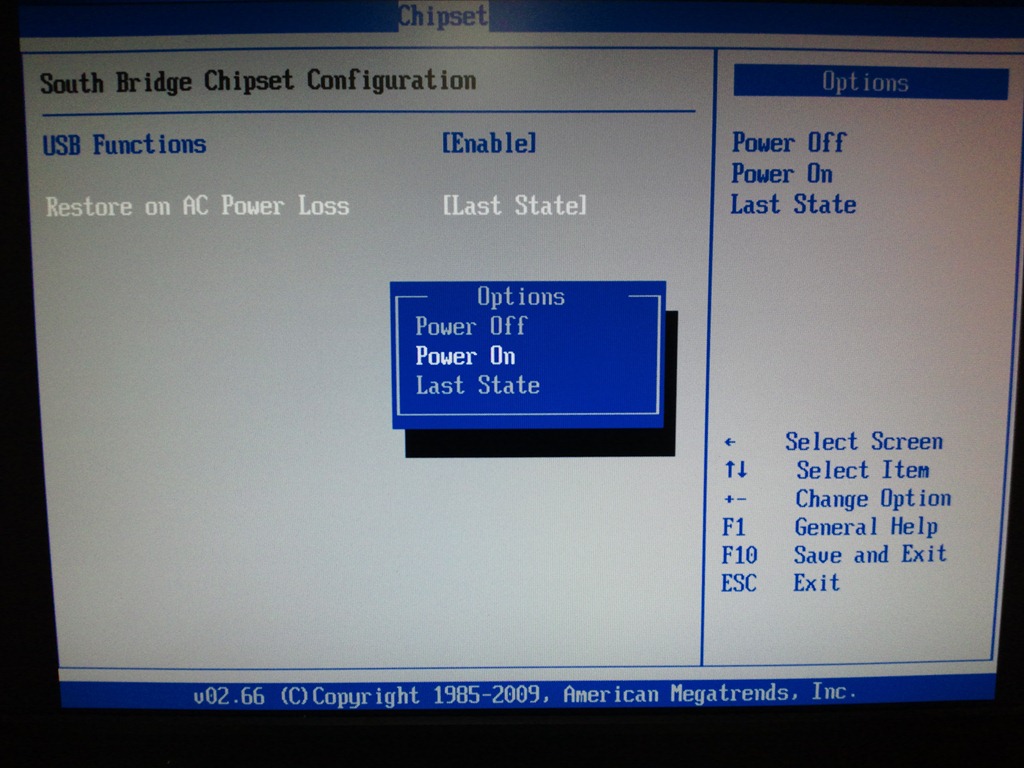
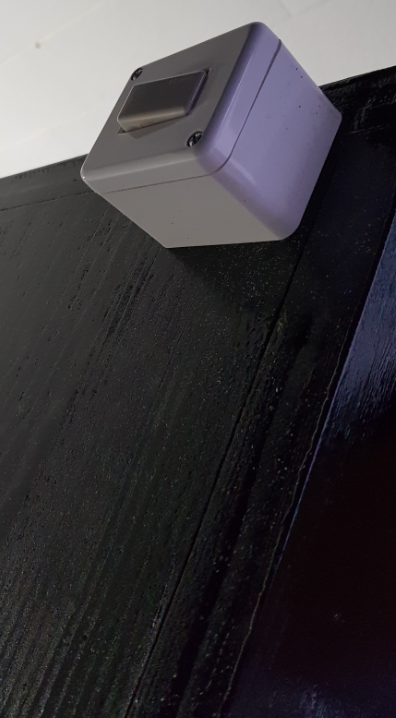
And later I foresaw in the design a master switch that would cut the power to the entire cabinet, so that once it was reactivated the BIOS would interpret the situation as a power return from a blackout. In addition, this modification gave me the fantastic opportunity to have a power button to be placed on the roof of the cabinet, just like the “real” ones!
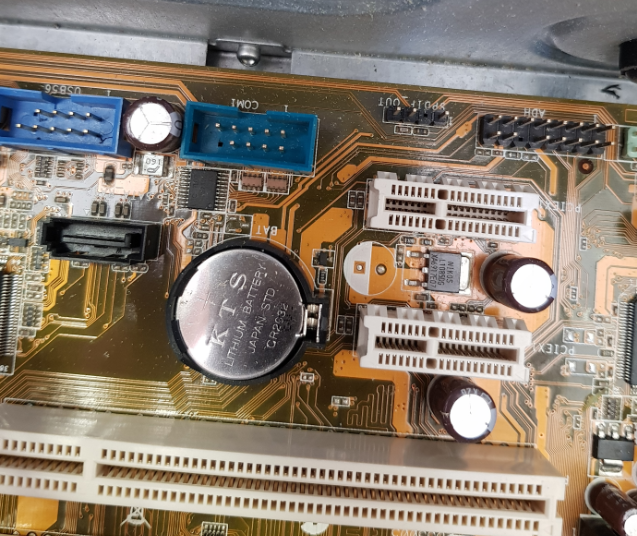
To close the BIOS chapter, I was left with one last thing to do: replace the CMOS battery in that old PC so that I would not lose the valuable setting.
Although this one battery represented a violation of my personal No Batteries rule, I could unfortunately not do without it.
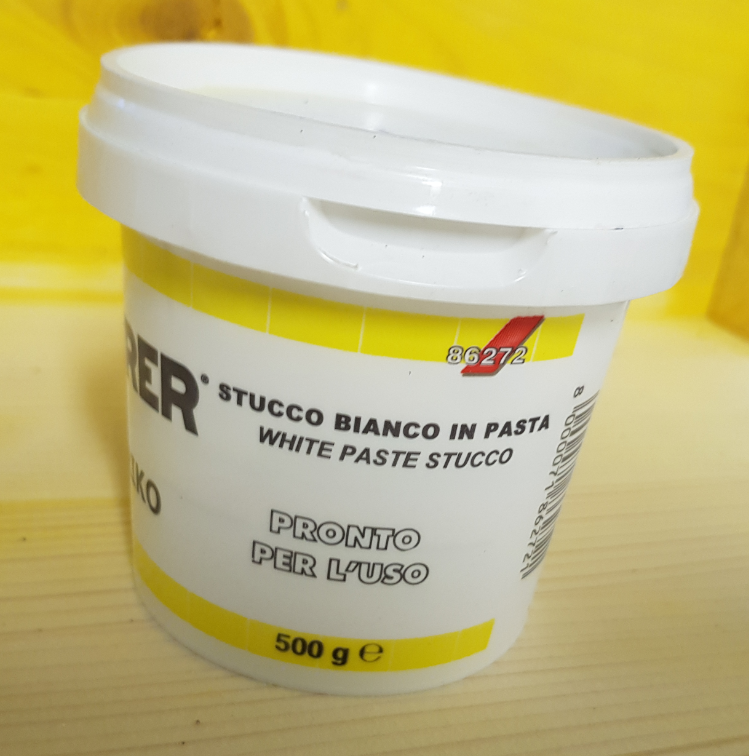
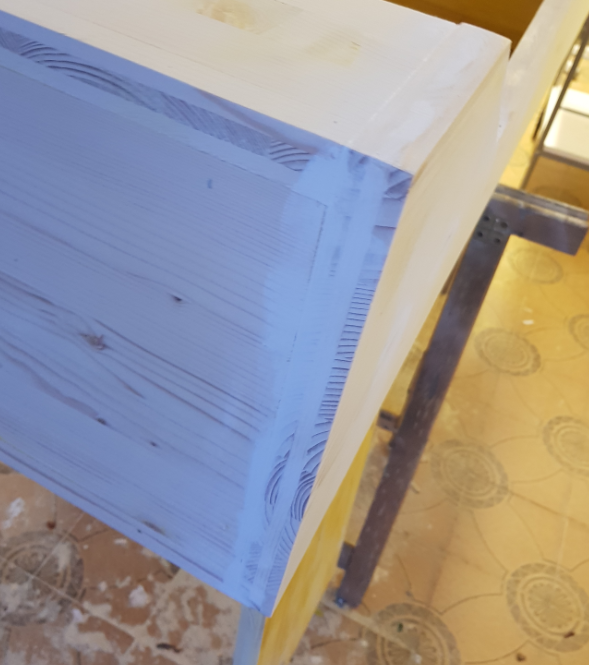
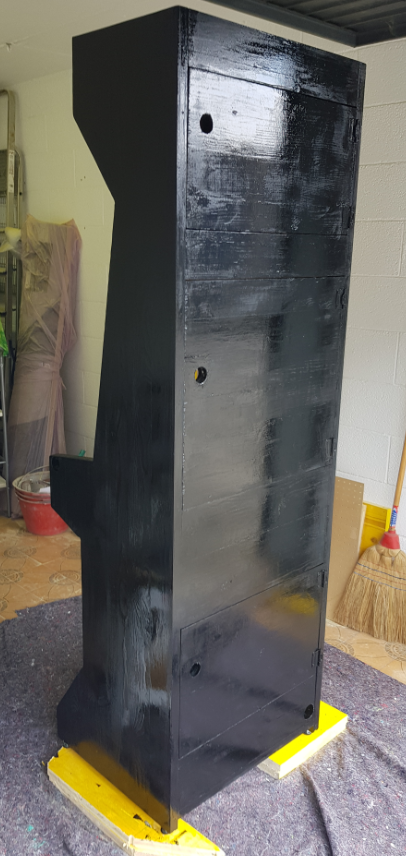
The cabinet was finally structurally complete, so we devoted the second part of the day to applying the first coat of glaze paint, this glaze paint:
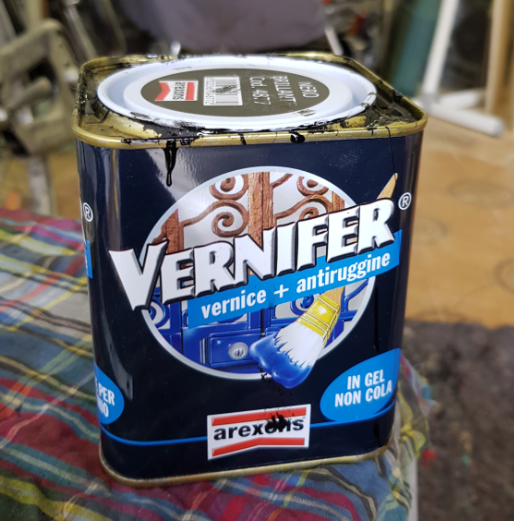
Alberto assured me that that specific glaze paint was opaque enough that pre-treatment to the wood was not necessary, so armed with roller and brush we began painting.
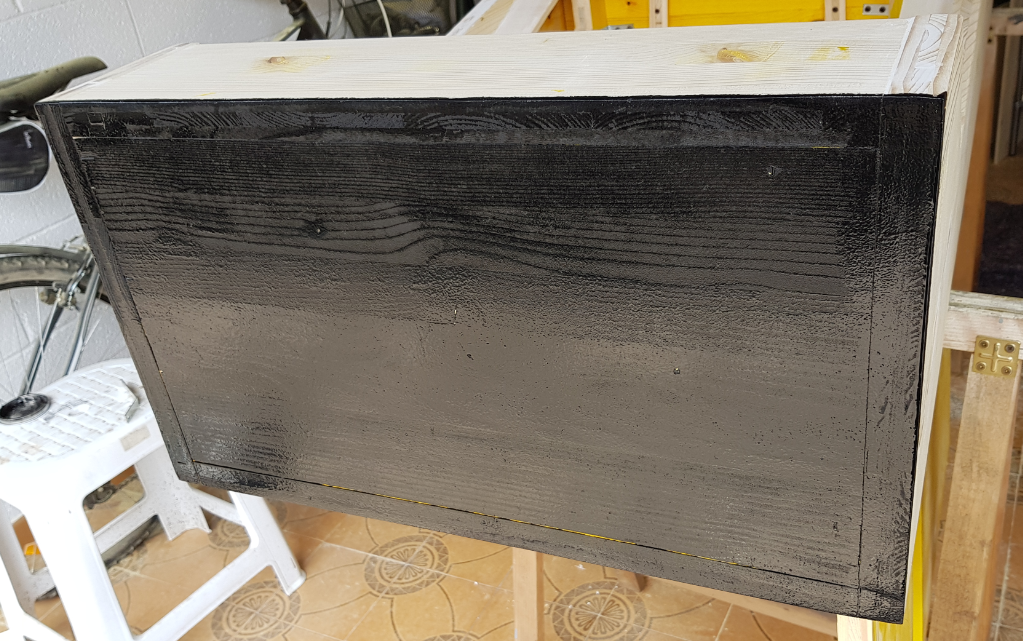
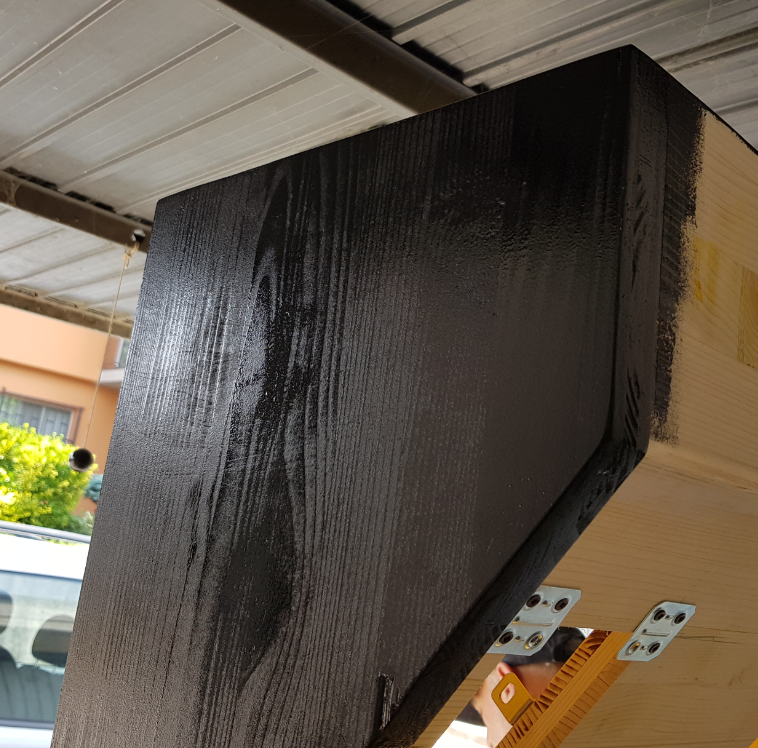
At the end of the day our beautiful cabinet had a beautiful new look: total black!
Before finishing that fantastic day’s work, having to wait at least 24 hours from the first coat of glaze paint, I filled a container with diluent and dipped the roller into it so that I could use it again the next day at the right time.

And in fact, I forgot one small detail…but I found out unfortunately only the next day….
Day 11 (20/05/2018) – Chemical reactions
Remember when I mentioned a little forgotten detail? Well … the detail in question was that the container where I poured the diluent was made of … drum roll
PLASTIC!
The scene I saw as soon as I opened the garage door was this:
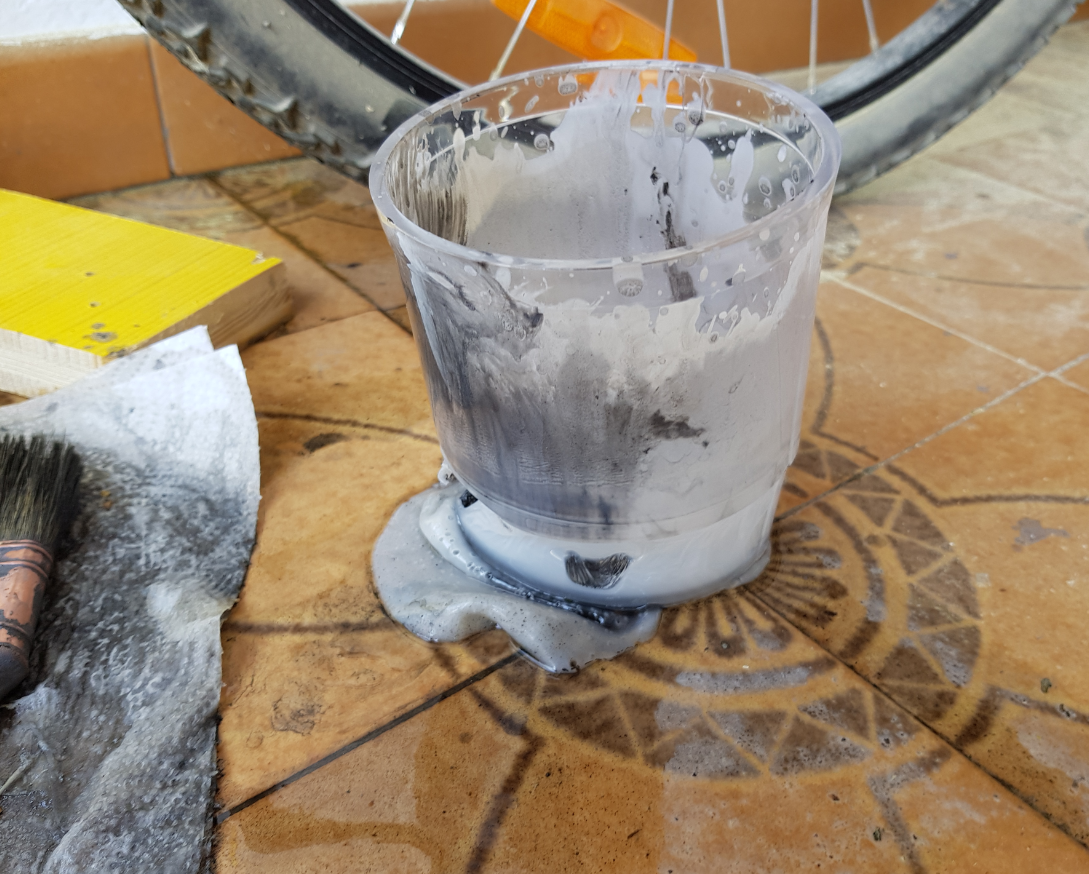
As for the roller that was in it, well, it was now reduced to a subspecies of melted plastic mush, totally unusable!
Since the roller was KO I fell back for the rest of the day to the good old brush, which rested fortunately not far from the disastrous mush.
By the end of the day my beautiful cabinet looked terrific: smooth, shiny, and above all, black!
Now it was time to let it rest for a while, and most importantly it was time to NOT clean the brush with diluent inside a plastic container!
Day 12 (21/05/2018) – Welcome
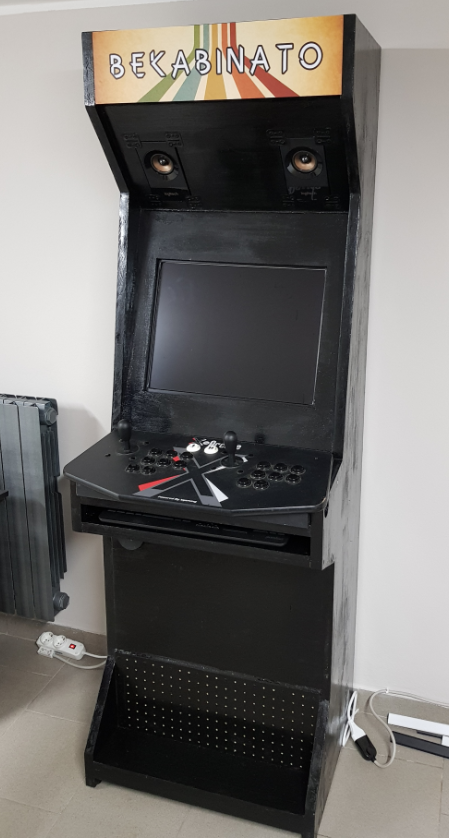
That Monday was memorable! The cabinet was just missing the final touches and would finally be ready to be welcomed into the house.
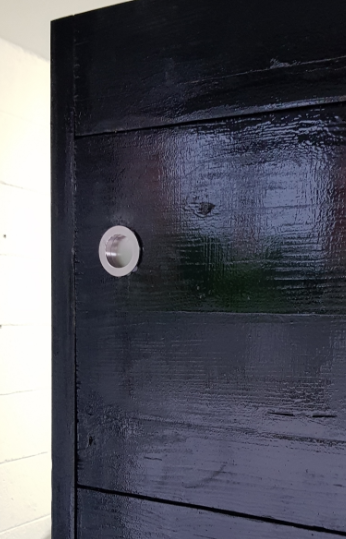
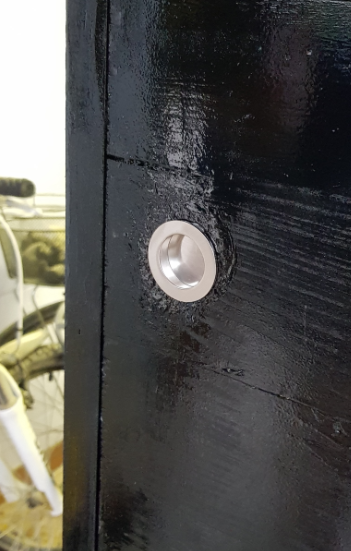
We began by refinishing the doors, adorning them with circular recessed handles.
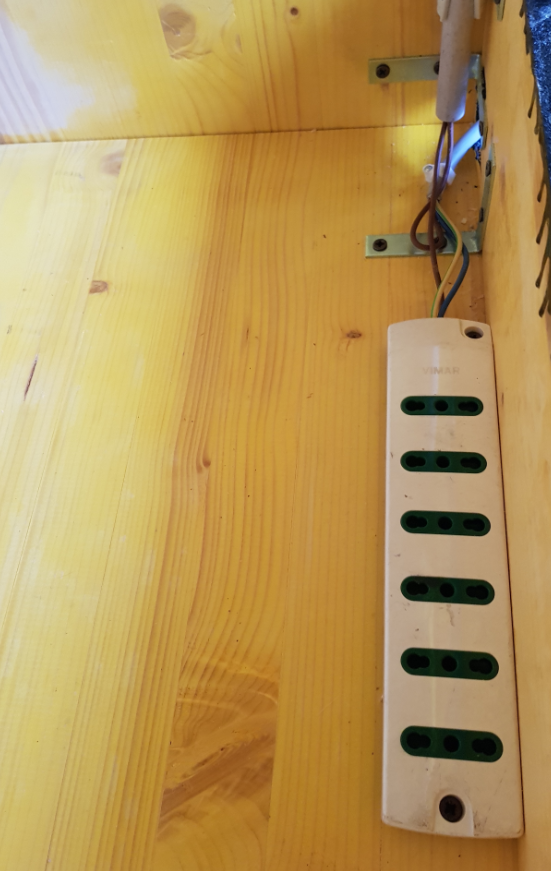
We also inserted an internal power strip connected to a main switch on the roof of the cabinet.
The time had finally come to load the cabinet onto a cargo cart and leave the garage for its final location: the basement of my home!
When we arrived at the house, Alberto and I had quite a bit of trouble getting the cabinet through the narrow staircase leading to the basement, but somehow it was finally there, looking better than ever!
I immediately began reassembling all the electronics inside the cabinet to make sure everything continued to work properly. The aesthetic impact with the paint job was remarkable, everything now looked in the right place!
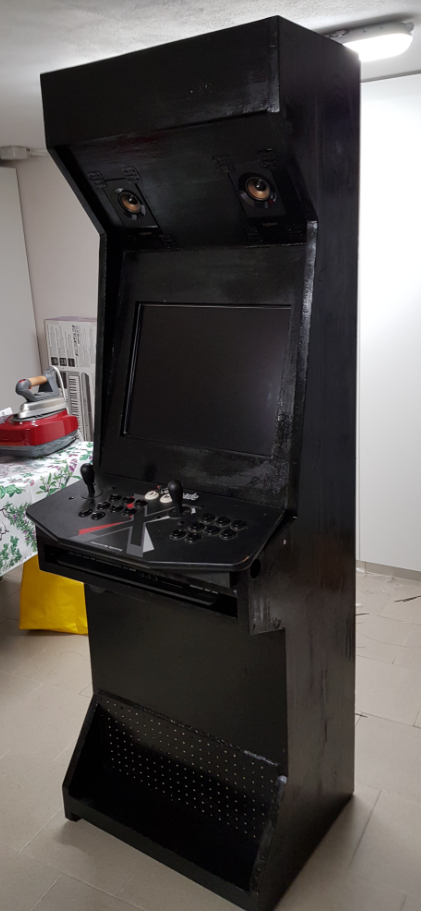

Although the total black look was very charismatic it came time to start thinking about a nice graphic to apply that would give it the finishing touch.
Day 13 (24/05/2018) – Indecision
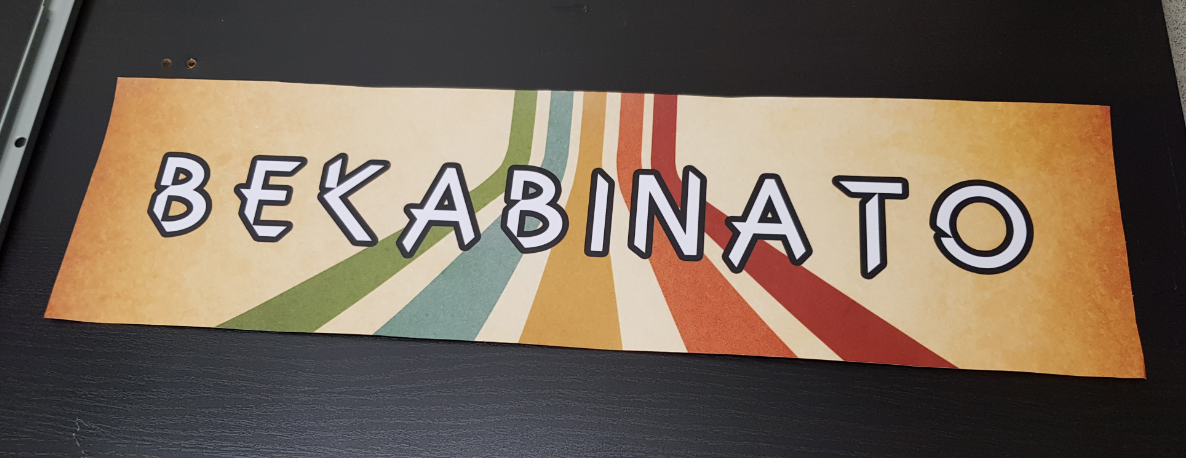
In the days that followed the cabinet move, I did nothing but make test graphics every night for the style of the cabinet, particularly for the so-called marquee.
In total I drew as many as 11 tests before arriving at one that convinced me enough.


While making them I would occasionally share the graphics with some friends or colleagues to gather opinions, finally after a few days I arrived at a convincing result:

The idea came to me thinking of the old Atari logo in a color variation from the 1980s
In name it could only be BEKABINATO, which is the union of Beka (the initial part of my nickname) and Cabinato (cabinet in Italian). What is that face? Batman can do that and I can’t?
Anyway, the choice was made! I ordered a permanent sticker online with the right measurements and immediately set to work on the coordinating graphics for the sides of the cabinet.
Day 14 (29/05/2018) – Style
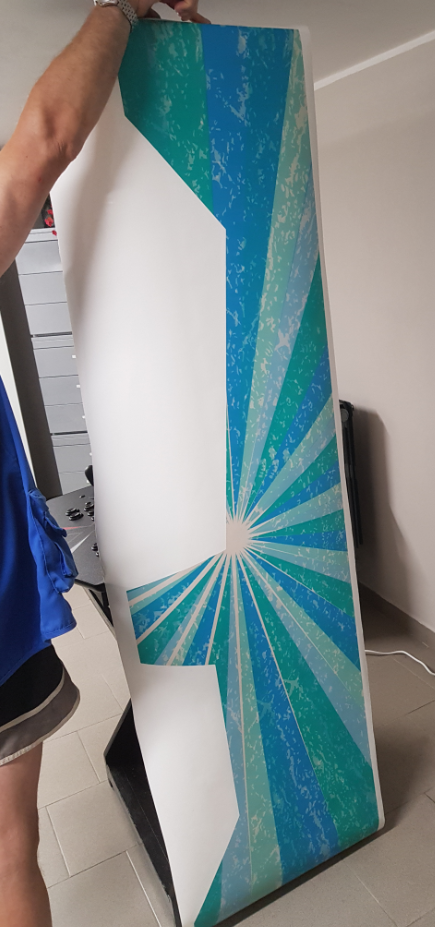
After a whole weekend of waiting, the marquee print finally arrived that Tuesday.
When I returned home with the print under my arm Alberto was already there waiting for me, betraying a certain impatience.
I unpacked the large cardboard that protected the print and laid it out on a dark surface to peer at any imperfections or flaws.
The printing was really well done and the colors (already encoded in CMYK) were extremely true to the file.
It only took a reduction of a few millimeters to make it fit perfectly with the dedicated space.
Before gluing the print to the cabinet we sprayed the entire area with adegreaser so as to slow the effect of the glue and giving us a way to “glide” the print over the surface until it was exactly flush with the edges.
The work was almost complete! I ordered the sidewall graphics that very evening, preparing for the final chapter of that fantastic journey.
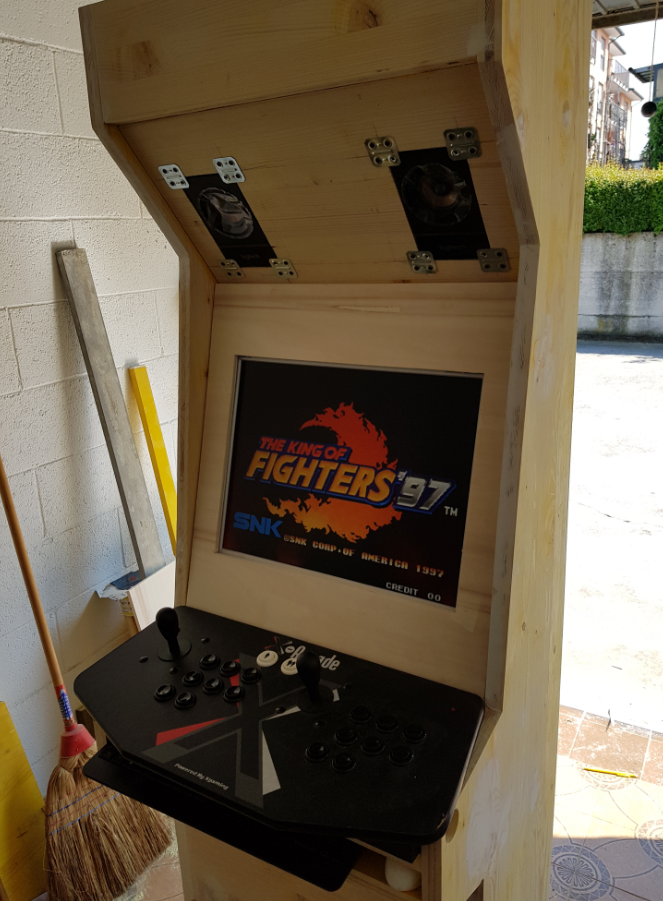
Day 15 (07/06/2018) – Mission accomplished!
That day, the adhesive prints of the sides of the cabinet finally arrived, I called Alberto back into action one more time, and in the evening we met for the final chapter of our undertaking: gluing 2 stickers nearly 2 meters high with as much precision as possible with no possibility of error.
It was a job to be done very, very slowly. We used a lot of degreaser that time so that we would have a few extra minutes to slide the long adhesive into its final position. After minutes that seemed endless we finally got to admire the side of the cabinet in its brand new “dress.”

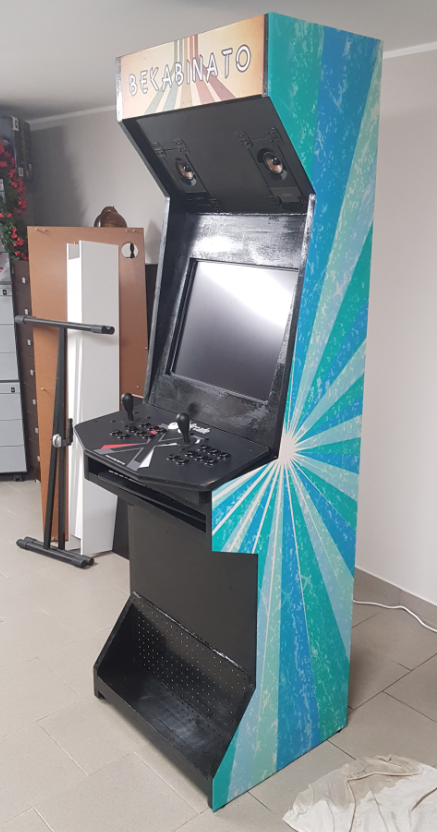
Encouraged by the result on the right side we immediately dashed to the left side, completing the task in a few minutes.
Those last few inches of adhesive filled my heart with a feeling of joy mixed with nostalgia, like watching the last episode of a good TV series.
We went through a lot to get to that point: 2 intense months, steeped in problems and solutions, ups and downs… 2 great months!
In exactly 15 days of intense work diluted in 2 months from the conception of the idea to its final realization, the Bekabinato was finally completed!
All of this I would love to get to you Enea… and I’m not just talking about a beautiful arcade cabinet down in the basement, but rather all the passion that drove me to tackle every problem, unafraid to change the schedule a little bit, to complete a project, all that desire to make something you only imagined in your mind become a reality… this, along with an occasional game with your old dad, is what I would love to get to you.
A big kiss from 2018, the year of your birth!
I love you so much.
- Dad